PayPal Express Checkout is a more advanced version of the standard PayPal payment option that is included with WooCommerce.
It has more features included with it and allows us to more tightly integrate PayPal into WooCommerce. This makes it the recommended method to add PayPal payments in WooCommerce for a variety of reasons.
Setup Steps
1. Navigate to WooCommerce -> Settings

WordPress Admin Panel -> WooCommerce -> Settings
2. Click on the Payments tab.

WooCommerce ->Settings -> Payments
3. Click the PayPal Express Checkout link or Manage button.

Express Checkout Settings within the WooCommerce Payments tab.
4. Set each option according to your needs.
Enable / Disable
Check this box to enable the payment gateway. Leave unchecked to disable it.
Title
This controls the label the user will see for this payment option during checkout.
Description
This controls the description the user will see for this payment option during checkout.
Sandbox API Username, Password, Signature
You may enter these values if you wish to run test transactions with the PayPal Sandbox.
To do this you will need to setup a PayPal developer account and then create a sandbox seller and buyer account to test with.
Once you have created a sandbox account you may login to this tool using the sandbox account to obtain your PayPal sandbox account API credentials.
Live API Username, Password, Signature
You will need to populate these values with the API credentials provided by your live PayPal account.
You may login to this tool with your PayPal account to quickly obtain these values.
PayPal Sandbox
Check this box to enable test mode so that all transactions will hit PayPal’s sandbox server instead of the live server. This should only be used during development as no real transactions will occur when this is enabled.
Error Email Notifications
Check this box to receive email notifications to the WordPress admin user account when PayPal API errors occur. The notification email will include the PayPal error code and message details.
Invoice ID Prefix
This allows you to set a value to be used as the prefix on invoice IDs generated by WooCommerce.
This can help to resolve duplicate invoice issues that may arise if you’re using PayPal Express Checkout on multiple websites where the same invoice IDs can get used. A prefix is required to avoid declined payments when this happens.
Order Review Page Title
- Set the Page Title value you would like used on the PayPal Express Checkout order review page.
Checkout Button Type
- PayPal Image – Displays the “Checkout with PayPal” graphic that PayPal provides.

- Text Button – Displays a basic text button (based on your theme) with the custom message entered.
- Custom Text – The value entered here will show up on the checkout button when Text Button is enabled.

- Custom Text – The value entered here will show up on the checkout button when Text Button is enabled.
- Custom Image – Displays a custom image that you choose from your media library or upload.


Cart Page
Check this box to display the Express Checkout / PayPal Credit options on the shopping cart page. This allows buyers to skip filling out the forms and helps increase conversion rates.
Minicart
Check this box to enable the PayPal Express Checkout button(s) in the mini-cart display often placed in the sidebar of design themes.
Cart Button Position
Adjust where you would like the PayPal Express Checkout buttons to be displayed on your shopping cart page (if enabled). Choices are above the cart details, below the cart details, or both.
Checkout Page Display
This option allows you to set how you would like to handle PayPal Express Checkout on your WooCommerce checkout page.
- One of the benefits of Express Checkout is that buyers do not have to fill out checkout forms on your site. This can lead to increased conversion rates and more sales.
- As such, it’s recommended that you include the PayPal Express Checkout option at the top of your checkout page.
- You may also add it to the general list of gateways that WooCommerce has enabled, display it both at the top of the page and in the general list, or disable it entirely (which, of course, is not recommended.)
Product Page
Check this box to display a PayPal Express Checkout button (based on your Checkout Button Type option) on your product details pages. This allows user to skip straight to PayPal payment when they want to buy a particular product and can increase conversion rate.

WooCommerce PayPal Express Checkout on Product Detail Page
PayPal Account Optional
If your PayPal account is setup with PayPal Account Optional enabled (available in your PayPal account profile) then setting this option here will provide a better checkout flow for non-PayPal users. It will be more obvious that you do not need a PayPal account in order to complete payment, and this will typically increase conversion rates.
Landing Page
Used in conjunction with the PayPal Account Optional setting, you can choose which type of page the user should see by default when they reach the PayPal login.
- Login – This will make the PayPal login option the default option.
- Billing – This will make the full credit card form the default option and is more obvious to non-PayPal users that they can pay you without creating an account.
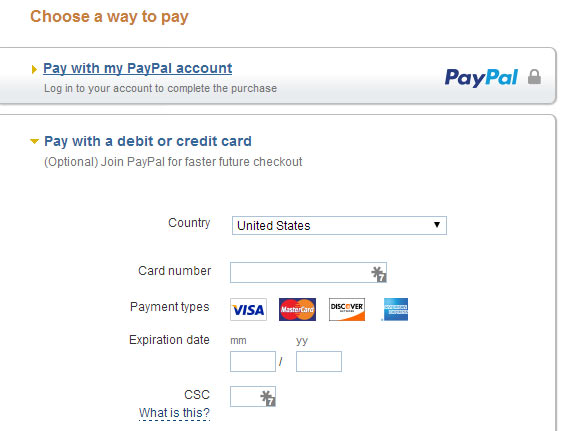
WooCommerce PayPal Express Checkout Choose a Way to Pay
Error Display Type
Set this to show or hide details about errors from buyers.
Generic – Displays general errors that do not reveal details and helps to prevent fraudulant activity on your site.

Detailed – Displays actual errors returned from PayPal.

Enable PayPal Credit
Check this box to enable the PayPal Credit payment option to show up next to the regular Express Checkout option. This allows you to offer financing to your buyers and can not only increase conversion rate, but also increase the avg. price per order.
- Note: Financing through PayPal Credit is still available when buyers checkout using the Express Checkout button, but it’s simply not as prominent.

WooCommerce PayPal Credit Express Checkout
Use WordPress Locale Code
Enable this option to pass the WPLANG value (set in your wp-config.php file) as a locale code in the PayPal payment requests. If PayPal supports the locale code passed, the PayPal Express Checkout review pages will be translated to the local language for that locale code.
- This can sometimes lead to problems where PayPal’s checkout system sends users to a Nigerian checkout even though that doesn’t match your locale code. If this is happening to you, simply uncheck the box to disable this feature and that should eliminate your problem.
Page Style
If you have configured a Custom Page Style template within your PayPal account profile you may set the Page Style Name here and it will be used during checkout.
Brand Name
This controls what users will see for the brand / company name on PayPal review pages.
PayPal Express Checkout Brand Name
PayPal Checkout Logo (190x60)
Here you may add the URL of an image you would like to display as the logo on the PayPal Express Checkout pages.
- If you have “Force Secure Checkout” enabled in WooCommerce, which means you must have a valid SSL certificate installed on your site, then you will be able to simply upload an image using the WordPress media manager.
- If you do not have an SSL certificate for your site you may upload your image to any SSL image service and simply copy/paste the URL here. We recommend SSLpic for this service.
PayPal Checkout Banner (750x90)
Here you may add the URL of an image you would to display in the header / banner section of the PayPal Express Checkout pages.
- If you have “Force Secure Checkout” enabled in WooCommerce, which means you must have a valid SSL certificate installed on your site, then you will be able to simply upload an image using the WordPress media manager.
- If you do not have an SSL certificate for your site you may upload your image to any SSL image service and simply copy/paste the URL here. We recommend SSLpic for this service.
Customer Service Number
This controls what users see for your customer service phone number on PayPal review pages.
Credit Card Statement Name
Set a value here to customize the name buyers will see on their credit card statement when using Guest Checkout or logging in and paying with a credit card as their funding source.
Express Checkout Message
This message is displayed at the top of the checkout page (if enabled) next to the Paypal Express Checkout button. You may adjust this message to say anything you like here.

Express Checkout Message
Skip Final Review
Enable this option to eliminate the additional review page that happens when PayPal returns a user to your site.
- The checkout system does not know the buyer’s shipping address until after they have signed in to PayPal. Once they are returned to your site, shipping and tax are calculated based on the shipping address returned by PayPal, and a final review page is displayed to break down the final totals for the buyer prior to completing the order.
- If you are selling products that do not require shipping and/or tax, you may decide to skip this final review page so that users will complete their payment on the PayPal pages. With this option enabled, PayPal will redirect the users back to your final “checkout complete” page instead of a review page, and there will be no further action required to complete the payment.
Payment Action
This allows you to adjust how you want to process the original transaction.
- Sale – This option will immediately capture the funds and move the money into your PayPal account.
- Authorization – This will authorize the funds for the transaction on the buyer’s account, but it will not actually capture the funds and move any money into your account.
- When you are ready you may capture the funds for the authorized order from the WooCommerce order screen.
- NOTE: For more details see our WooCommerce PayPal Authorize and Capture documentation.
Billing Address
When a buyer uses PayPal Express Checkout from a product page or the shopping cart page on your site, the application does not know what their address is because they are skipping the checkout page.
In these cases, PayPal returns a shipping address back to the site, and by default, this is the only address that gets saved with the WooCommerce order. The billing address gets left blank.
Enable this option if you would like the WooCommerce order to populate the billing address using the same address that PayPal returns for shipping.
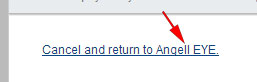
Cancel Page
Choose which page from your WordPress catalog you would like to use as the landing page if a buyer cancels the checkout from the PayPal checkout pages.
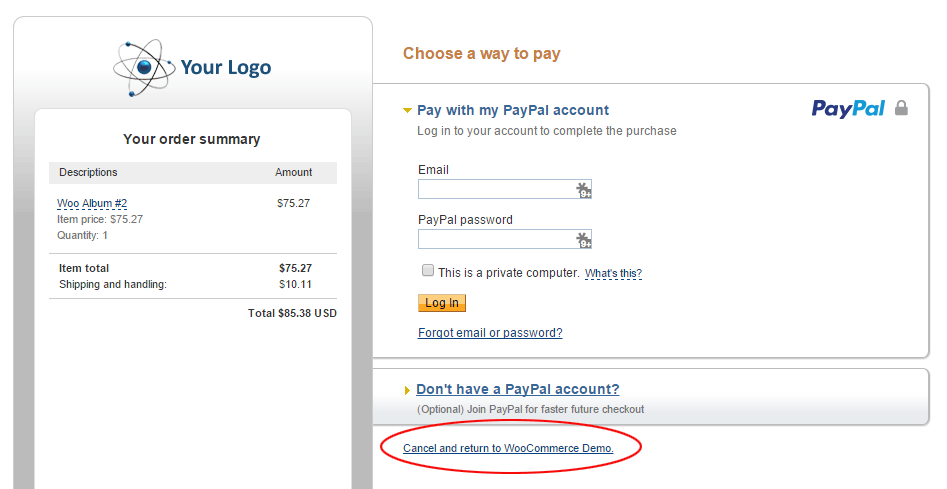
PayPal Express Checkout Cancel Link
Send Item Details
Enable this option to include line item details in the PayPal payment request. Doing this will include the details in the PayPal transaction details so that they show up in the PayPal account.

PayPal Express Checkout Line Items
Enable Tokenized Payments
Enable this option to give buyers the ability to save their payment method for future reference so that they can checkout more quickly. With the payment method saved, next time they buy something on your site they will be able to select the saved payment method and checkout instantly without going through any PayPal logins.
Important Note
In order to utilize token payments with Express Checkout you need to contact PayPal and ask them to enable Billing Agreements on your account. Token payments will not work correctly until this step has been completed and verified by PayPal!
Enable PayPal IPN
By default, if IPN is enabled in your PayPal account profile the data will be sent to the URL specified there. If you would like to override this value so that IPNs from this site are sent to a different URL then you can set that URL here.
Prevent Adding Extra Item
If you have enabled the Express Checkout button on product pages, then the default action when the PayPal button is pushed is to add one unit of the product to the cart and then trigger the redirect to PayPal. In most cases this works just fine for buyers.
Sometimes, though, buyers may add a unit to the cart, continue browsing the site, and then later come back to the same product page and click the PayPal button to checkout. In this case the cart would end up with two units. If you find that many of your buyers are running this and causing confusion then you can enable this option so that the buyer will be sent to PayPal without adding an additional unit to the cart before-hand.
Save Abandoned Checkouts
When a buyer chooses to pay with PayPal Express Checkout they are redirected to PayPal where they can login, review the order, and are then returned back to your site.*
The order in WooCommerce is not created until after the buyer returns. As such, if they never do return from PayPal for any reason you would lose track of this lost sale. Enable this option to have orders created in WooCommerce prior to sending them to PayPal so that the Pending order will be saved in WooCommerce even if the buyer doesn’t make it back from PayPal.
* Note that if you have In-Context enabled, no redirection will occur, so this option becomes obsolete.
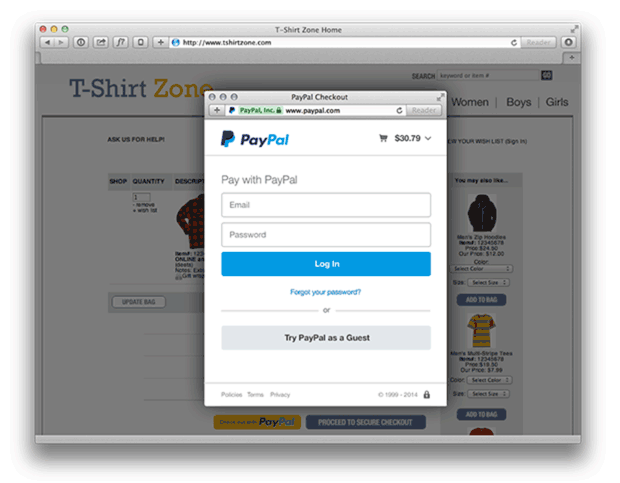
Enable In-Context
By default, when buyers click the PayPal Express Checkout button for payment they are redirected to PayPal where they can login, review the order, and are then returned back to your website for final review and payment confirmation.
The In-Context feature will open the PayPal login and checkout screens within a pop-up that sits on top of your site, so no redirection takes place. This can make the buyer feel more “at home” when completing their purchase, and could potentially lead to increased conversion rates on your site.
Debug
Enable this option to create logs of all PayPal payment requests. These logs will be available under WooCommerce -> Status -> Logs, and can prove useful when troubleshooting issues.
Smart Buttons
Smart Buttons are PayPal hosted buttons that provide lots of features and functionality.
See our guide on using Smart Buttons for more details.
PayPal Marketing Solutions
PayPal Marketing Solutions adds a JavaScript snippet to your site that tracks buyer behavior and provides reports that you can use to study product trends and growth on your site. The feature also adds PayPal Credit banners to your website so that buyers know benefits like “6 Months Same as Cash” are available, which can lead to increased conversion rates as well as increased avg. order amount on your site.
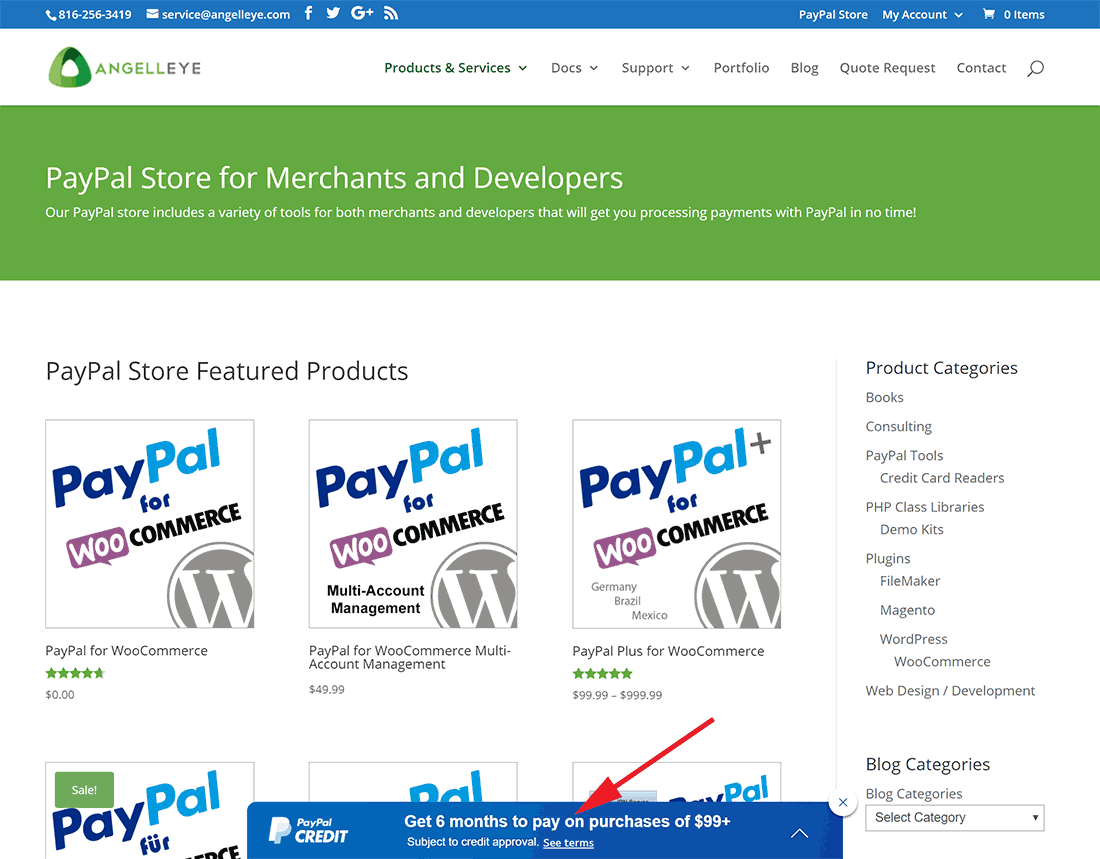
PayPal Credit Banner
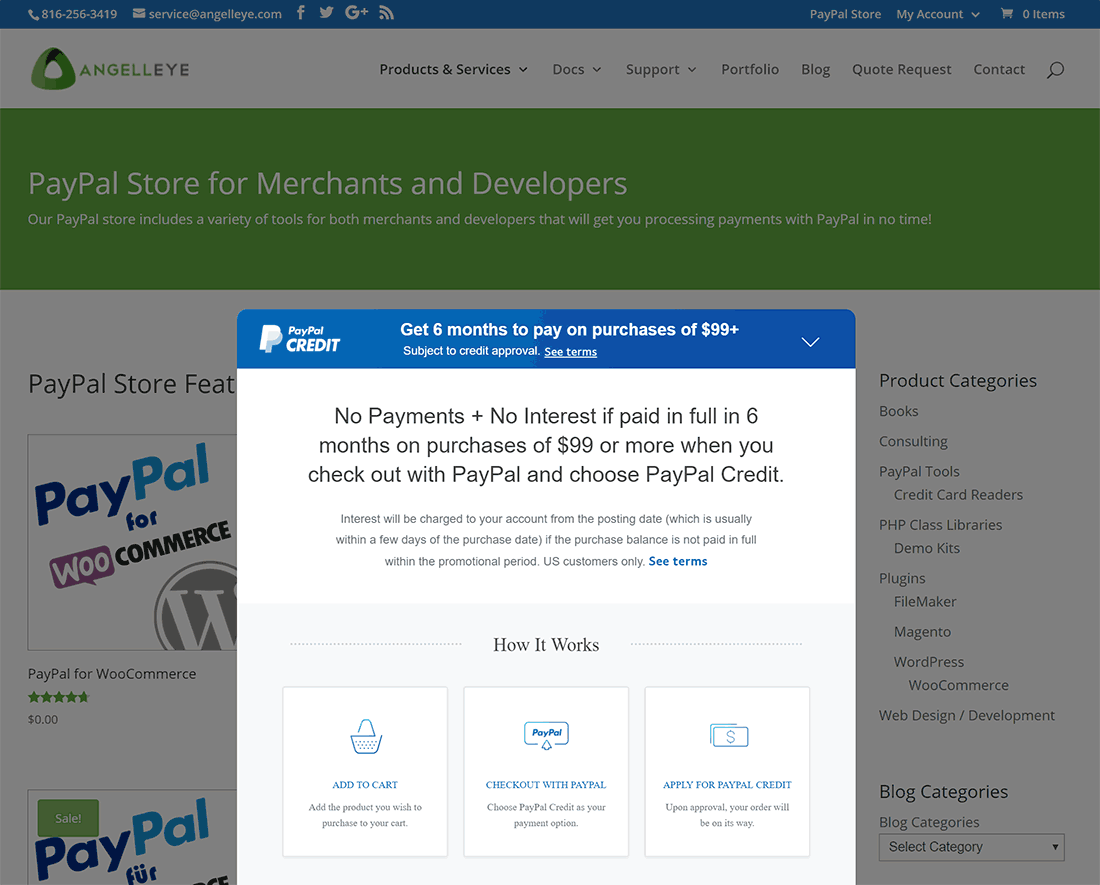
WooCommerce PayPal Marketing Solutions Credit Banner Displayed
Manage Settings / View Shopper Insights
After activating PayPal marketing solutions you will see buttons for Manage Settings and View Shopper Insights. Click Manage Settings and login with your PayPal account to switch individual features On or Off:
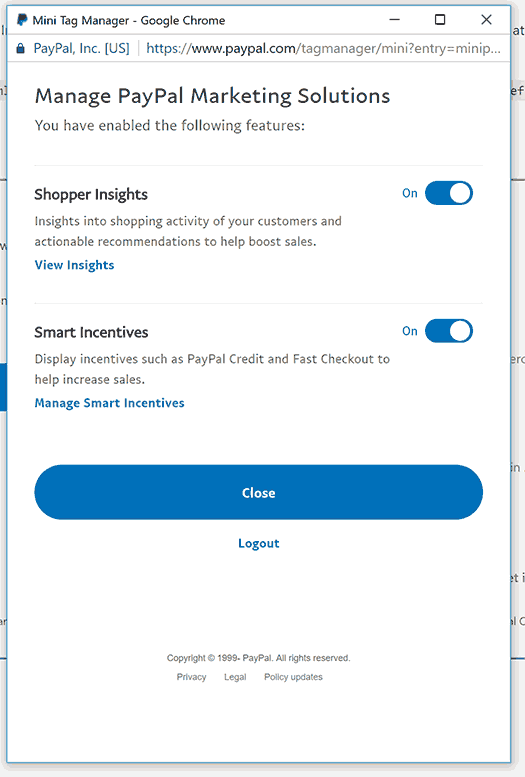
Toggle features like Shopper Insights and Smart Incentives On/Off.
The View Shopper Insights button will send you directly to the Analytics page in your PayPal account.
5. Click the Save Changes button to submit your changes.
6. Configure Product Level Settings
Some features of the PayPal Express Checkout integration included in PayPal for WooCommerce are specific to the product level.
Looking for Live Help?
Schedule a live meeting with Drew Angell, PayPal Certified Developer, and get all of your questions or concerns answered.

Featured PayPal Products and Services
-

PayPal for WooCommerce
FREE! -
WooCommerce Multiple PayPal Accounts Plugin
FREE! -
PayPal Shipment Tracking for WooCommerce
$49.99 -
Offers for WooCommerce
$59.99 -
WordPress PayPal Invoice Plugin
$20.00 -
PayPal Webhooks for WordPress
$79.99 -
Sale!
PayPal IPN for WordPress
Original price was: $59.99.$49.99Current price is: $49.99. -
WordPress PayPal IPN Forwarder
$19.99


I get the following error with PayPal Express Checkout:
There was a problem connecting to PayPal to setup your purchase. Please try again.
10002 – Security error – Security header is not valid
I have all the live API info in. What am I doing wrong?
That error means the credentials getting sent are wrong. Double check your values and if you’re sure they’re correct you just need to make sure $sandbox is evaluating correctly when passed into the library so you’re not sending live credentials to the sandbox or vise-versa. If you continue to struggle contact me directly and I can help you more.
Thanks, Andrew! I’ve quadruple checked the creds. No joy. I tried enabling and disabling the sandbox. I deleted all info from the Sandbox fields and the checkbox for Enable Sandbox is unchecked. The live creds are in the live fields. I’ve enabled only PayPal Express for payment options. Is there anything else I need to do to make sure we’re switched to live?
I got your email. We’ll talk more there and figure this out.
Hi Andrew,
Great plugin ! My Congrats!
Unfortunately I’m struggling also and decided to contact you directly. 🙂
Using Paypal woocommerce plugin:
1) Sandbox account
2) Error Display Type
a) Using Generic type show this error:
“There was a problem paying with PayPal. Please try another method.()” I’m using sandbox credentials
b) Using Detailed type show this error:
“-”
I have no Idea why the problem occurs. I’m using default settings of “Mystile” theme 🙂
Maybe I’m missing some settings?
I saw that user RMJ from http://www.stateofattraction.com/ solved successfully his trouble.
I will greatly appreciate your help!
Thanks in advance!
Sincerly,
Kristian
If you enable the detailed error messaging from within the plugin settings you’ll more information about why it failed. It sounds like you probably just need to get your API credentials correctly in the plugin settings.
Hi
I have the same problem with error with 10002, have you worked what the problem is?
10002 is a general error that basically means the PayPal server was unresponsive. Is this happening to you in the sandbox or live? It can happen in the sandbox quite often, unfortunately, but it shouldn’t happen very often on the live server.
Same problem. I did everything right four times. I cant set up my button.
If you are getting the security header error then that means the credentials are not correct. I know you said you “did it right four times”, but this must not be the case if you are getting that error. You need to make sure you grabbed the correct credentials from the correct account. For example, if you’re setting up a sandbox account for testing you need to make sure you pull credentials from a sandbox account. If you’re setting it up live, make sure the credentials are from the live account. It would be two entirely different sets of credentials.
Hi Andrew,
I’m trying to use your plugin: Paypal for WooCommerce. I’m using Paypal sandbox with the API info.
My problems are:
1.- The Express Checkout button on checkout page does not display but I have this option checked.
2.- When PayPal is redirected back to my web site I get this error:
Strict Standards: Only variables should be assigned by reference in C:\xampp\apps\wordpress\htdocs\wp-content\themes\mystile\comments.php on line 28
3.- Also, the orders remains in processing state, instead of complete state
I have the option: “Enable purchases without registration”, unchecked
I am using Mystile theme from WooThemes. My installation is local. My WordPress version is: 3.8.3
Please, could you help me?
Best regards from Spain and have a nice day!
Sandra 🙂
Please contact me directly so I can get login credentials from you and I’ll be happy to jump in there and take a look at what’s going on.
Hi
I cant seem to save the changes to the ‘Checkout’ tag without getting the following error
The requested URL “http://kmetrics.com.au/pondaestate/wordpress/wp-admin/admin.php?hsimp=yhse-001” cannot be found or is not available.
hsimp=yhse-001 isn’t coming from the PayPal for WooCommerce plugin, so there must be a conflict happening with your theme or maybe another plugin. Are you running many other plugins?
What version of WordPress and WooCommerce are you running? Also what theme and version? The first thing I’d recommend is disable other plugins to see if the problem goes away. If so, re-enable one at a time until the problem happens again. Then you’ll know which one is the culprit.
Running latest versions of WordPress 3.9.1 and WooCommerce 2.1.8, have disable all other plugins and tried themes twenty fourteen and twenty twelve. I don’t have the SOAP Client class enabled, not sure if that will be the problem. I can save changes to ‘Checkout’ but when I go in the next level to change and save the Paypal express settings within Checkout, that is where it falls over
I deleted everything and started again. Same problem. When I edit the Paypal Express settings on the ‘Checkout’ tab and go to save changes Its returning a page “…/wordpress/wp-admin/admin.php?page=wc-settings&tab=checkout§ion=wc_gateway_paypal_express_angelleye” that it cannot find. 404 error page comes up
Please contact me directly and let me know a login to your WordPress panel so I can take a look. I haven’t had this complaint from any other users, so I need to see what might be unique about your system.
Hi Andrew
Firstly, thanks for creating this plugin – it was more intuitive to use than the std WC options.
I have a question re Paypal Express which I was hoping to see answerd in the docs, but unfortunately not. I have a need to get the shipping and billing address details in the WC database tables (as if the user hadn’t bypassed entering the data) as I poll the database and download new orders to a local orders DB where I do a lot of other smarts on the data. Does the plugin return address details from PayPal to the WC store?
I have tested and looked and data and all I got back was an email address, but it could just be the way I tested, paypal user etc, hence the question.
PayPal’s system only returns a shipping address. This is one of the advantages of PayPal for buyers. Actual billing information is not shared with sellers. So you should see the single address coming back and saved in the order, but during checkout the billing address would just show N/A.
You’re saying you ran a full test and did not get an address back? If that’s the case the user must have chosen “no shipping required” during checkout. At least that would be my guess without seeing it more directly. It’s not something I’ve heard complaints about or experienced myself, so it’s tough to say for sure what would cause that.
Feel free to purchase a premium support ticket if you would like more help figuring it out.
I got an email address and (now that I’ve looked a little deeper) a shipping address, but no billing. That’s consistent with what you have indicated would be expected, so looks like it was my testing process.
Thanks for explaining that,
Glad to hear it. Let me know if you have any other questions or concerns.
The Express Checkout seems to be working fine, thanks for this great plugin!
However – if a customer ignores the Express button and goes through the usual WC checkout process, at the end it says “Sorry, it seems that there are no available payment methods for your state. Please contact us if you require assistance or wish to make alternate arrangements.”
It seems to be expecting another payment option besides PayPal Express Checkout – but that’s the ONLY one I’ve activated in the WC Checkout settings. How do I make it so there’s no other option available to the user besides PP Express Checkout?
One other small detail – if I choose the “button text” option, it’s just a plain text link that shows up, not a button from the theme (Avada 3.4.3). So I’ve chosen the PP graphic for now, but would be nice to have the button text option working.
Right, the idea behind Express Checkout is that they can skip the checkout page. If EC is the only option you have enabled, you can simply hide your checkout page altogether. The cart page should just show a single checkout button at that point, but it would take you straight to the PayPal EC flow and not to the WooCommerce checkout page.
Some themes add a checkout button directly to the theme, though, rather than using the WC provided hooks to output the checkout button(s) accordingly. If your theme is doing this you might actually see 2 checkout buttons on the cart page. In that case you just need to get rid of their checkout button from within your child theme and let the plugin (which uses the proper WC hooks) handle outputting the checkout button(s).
Andrew,
I understand this, but is there no way to use your plugin with the checkout-page of my theme. I want customers to checkout officially through my site and then go to the express checkout. I don’t want it to show “Sorry, it seems that there are no available payment methods for your state”… Any ideas? How can I contact you directly for a question about Security header is not valid
Hi Mac,
I’ve already added this feature into the dev branch for the plugin on GitHub. You can download that version here. Extract the zip and then upload the plugin files to your server replacing the existing plugin files. Then you’ll find some new options in the Express Checkout settings, including the ability to display it in the regular list of gateways on the checkout page.
Hi, I just installed the plugin and I have that exact problem and I don’t see any options to make it have the ability to display it in the regular list of gateways on the checkout page.
Look for the “Checkout Page Display” option in the Express Checkout settings. It has a drop-down with different options, and those options include the ability to add to the general list of gateways on the checkout page.
I have chosen ‘add to the general list of gateways on the checkout’ but still get
‘Sorry, it seems that there are no available payment methods for your state. Please contact us if you require assistance or wish to make alternate arrangements.’
I really need to get my site working with credit cards without requiring a paypal account
Hi Colin,
Please submit a ticket here and our support team will help you figure out what’s going on. Thanks!
Thanks for a great plugin. I was hoping your plugin would help solve the problem that I am not getting order notification emails generated from WC. All other WP emails are sent fine through Mandrill for WP plugin. I am on WP Engine hosting.
Anything come to mind that I should check?
Do you have all the order emails enabled under WC -> Settings -> Emails? That’s the only reason I can think they wouldn’t be getting sent as I haven’t had any complaints about this from anybody else, and I get all of my order emails just fine.
Thanks very much for your work on this very useful plugin!
Glad to hear it’s working out for you!
First of all thanks for providing such a wonderful plugin for free!
I would like to know if the paypal icon can be remove at the “Cart” page ? (refer to http://www.fashtaghk.com) as I think the paypal icon is shown one page early. If so what configuration should I set?
Keep up the good work and thanks in advance!
Jeremy
Hey, don’t worry about the question I raised, I have changed the button name to “Pay via bank deposit” from “Proceed to Checkout” in cart.php, thanks!
Jeremy
Glad you got it worked out!
Hey Andrew,
Great plug-in. I do have two questions. And it’s kind of referencing Jeremy’s question from earlier. I am trying to remove the PayPal button on the cart page. Is there any way that is possible. Only to have it on the products page ( which it is now ) and the final checkout page ( which it is now ).
Also, I am using a bundle rate shipping plugin, which displays 2 different shipping methods a customer can use. ( USPS standard and USPS Priority ). If the customer uses the PayPal link, it puts in the higher price shipping on the PayPal landing page. Is there anyway to get the PayPal landing page to have the two options for whatever shipping was initially shown on the checkout page so the buyer still has the choice. If they use the PayPal button to checkout, it seems as though they don’t get the choice for shipping.
Thank you!,
Mike
For now, there isn’t a specific option to hide the button on the cart page. You could add some CSS to your child theme to hide it, though, until the next plugin update which will have that option added. If you need help with that you could purchase some premium support and I could do it for you.
The PayPal landing page will only display a single shipping amount. The options will only show up on your WooCommerce pages, and whatever is selected there should carry over to PayPal. Are you saying that you’re choosing a lower shipping option but it’s still displaying the higher one?
Keep in mind, too, that after the person signs in to PayPal and it grabs their shipping address the options will be updated on the final review page on your site. That’s where the user’s actual shipping address (from PayPal) would be pushed through the shipping calculator and options would display accordingly. At that point, whichever option is selected is what will be charged.
Are you having a different experience than that?
I understand about the cart page. I will look at the css. For the PayPal having only one shipping, I see what was happening. On the cart page, the two shipping option’s box was too small so it was not allowing the customer to pick which shipping they wanted, and it seemed that the higher shipping choice was being pushed to PayPal. But now that they can pick which option and it does push that option to PayPal. Thank you very much for your fast reply. One last question I meant to ask earlier. Have you heard of any problems with the gift notes/wrapping not showing up on PayPal? I have them selected but they are not showing up.
Thanks again,
Mike
Nope, I haven’t had any complaints about that. Do you have logging enabled? Please sure logging is enabled and give it another try. Then submit a support ticket and include those log files.
Hi, are you able to help with the following error that I receive by email when I try to buy (using the sandbox)
SetExpressCheckout API call failed.
Error Code: 10413
Error Severity Code: Error
Short Error Message: Transaction refused because of an invalid argument. See additional error messages for details.
Detailed Error Message: The totals of the cart item amounts do not match order amounts.
I suppose there is more information I can give but I’m not sure where to start looking for the possible causes so maybe it’s best if you ask for extra info you’d need to try to find the cause. Any help you could offer would be most appreciated. It’s all parked on a staging server at present.
Please make sure logging is enabled in the plugin settings. Then run another test transaction to reproduce the error. Then submit a ticket here and attach the logs from /wp-content/plugins/woocommerce/logs on your web server.
Thanks, I have error logs from earlier attempts and I’ve submitted the most recent.
Hello,
I get the same error on my site, Error 10413. Would you kindly email to me the solution? Big thanks!
Hello again,
Sorry my error is:
Error 10413 – The totals of the cart item amounts do not match order amounts.
Kindly help. Thanks!
Can you verify which versions of WooCommerce and our plugin you are running?
Please verify which version of WooCommerce and our plugin you are running at the moment.
Hi this plug in has saved me a lot of time & hassle not having to style woocommerce checkout pages etc so thanks for developing it!
Is there a way I can implement the “Express Checkout Redirect to Let Buyers Pay on PayPal” rather than redirecting back to my website to confirm order?
I think this would only work if I could create some sort of custom text that appears on paypal after the customer has payed for their digital download, is this possible within the realms of the plug in?
Express Checkout does allow you to finalize the payment on the PayPal pages, but then it would still redirect back to your site. Instead of another review page, though, it would just show your final thank you / receipt page. Unfortunately, this is not yet available in the plugin, but it is on my list of updates for the 1.2 release. That may still be a month or two away, though. I could help you customize the plugin to do what you want until then, but that would require a premium support ticket.
Thanks for the speedy response! fortunately my business won’t be going live for a few months so I think I’ll wait for the update 🙂
Is there anything I need to turn on in my Paypal Business Standard account to be able to use Paypal Express Checkout for WooCommerce? If yes, where do I find it?
Hi Jan,
If the PayPal account is a business account then you should be ready to rock! Nothing else necessary. Let me know if you have any issues, though, and I’ll be happy to help.
Thanks for your reply to my earlier question.
I was helping an associate set up a Paypal Business account a few weeks ago. During the setup she had to choose whether to use Paypal Express or a a shopping cart. To use your Paypal Express Checkout plulgin, which should she have chosen? Or does it matter? Thanks in advance!
I’m not sure where you would have been seeing that option, but the plugin uses Express Checkout. I don’t think it would matter with way, though. Probably just guides you to different documentation which won’t really be relevant for the plugin anyway.
Hi
I need people that buy my digital products to be recognised (signed in) by their username when they have purchased something, currently this seems to be set as an email address and not username with PayPal Express for WooCommerce.
Default WooCommerce uses the username but I can’t find how to do this with this plugin, only option I see is email address.
Am I missing something?
Thanks
To be honest I really haven’t dug into this all that much. We did make sure that if the WC settings required the user to be signed in that the review order page would force this, but I never looked into email address vs. username specifically. I just piggy backed off what the system was already doing.
Without this plugin i’m pretty sure that there is an option (on form) for customers to create a username at the time of purchase. The username is shown/used then by default. However with this plugin the username option is not there at all, the box option is gone!
So without the username the email address is used, when the customer then returns to my site after purchase (my site also uses buddypress for membership) the customer is revealed to the word by his email address, not the default username. Like a forum, you don’t want people to see your email address!
Hi, thanks for the great and good working plug-in!!!
I just wanted to ask, what I have to do that the payment process is directly finished on the PayPal site
and the customer is not moved back to my site – having to press the “finish payment” button there again.
Thanks a lot Oliver.
Express Checkout will always move back to your site, however, I will be adding an option in the 1.2 release that will allow you to specify that you don’t need the final review page. In this case the PayPal review page would be the final review. They would still be sent back to your site, but they would be taken directly to the final receipt / thank you page instead of another review. The 1.2 release won’t be ready for another month or so, though, unfortunately.
I am new to PayPal and WooCommerce. Where do I setup/find my:
Live API Username – This is the API username value for your live account to process real payments with.
Live API Password – This is the API username value for your live account to process real payments with.
Live API Signature – This is the API username value for your live account to process real payments with.
Thanks!
You can use this link to obtain those values. Just login to that tool with your PayPal account and it will return the values for you.
Hi there,
I have installed your plugin on my website and am having some problems getting Paypal Express to work. After the customer clicks ‘PLACE ORDER’ they are taken back to the shopping cart (rather than the ORDER RECEIVED page). I get an email with this message:
PayPal Express Checkout Error Notification
DoExpressCheckoutPayment API call failed.
Error Code: 10410
Error Severity Code: Error
Short Error Message: Invalid token
Detailed Error Message: Invalid token.
If you could offer any advice I’d be really grateful.
Thanks,
Frances
I’ve had this complaint from a few random people, but I’ve never been able to get details from them to try and figure out what could be causing it. That data is stored in session variables, so somehow your server must be dropping that session data for some reason. If you can submit a ticket here and provide your WP login credentials as well as FTP credentials for your site I can jump in there and take a look.
Hello Andrew,
I’d like to ask your help. I bought WC PayPal express extension but I was disappointed. After reading their product description I thought it solves card payment. But it offers debit and credit card payment option only in certain countries. I initiated purchase from Hungary and Denmark but it offered only “Create a PayPal account” instead of “Pay with a debit or credit card”. Additionally the shop will be operated in Peru.
My question is that Can it happen the same with your PayPal extension? Or does it offer card payment option in any case?
Thank you,
Andras Kovacs
Those limitations are from PayPal, and unfortunately, it would be the same with our plugin. Sorry I don’t have better news for you.
Hello Andrew,
Thank you for your answer. And what gateway or solution should be used to enable major debit and credit card payment that not depends on geographical position?
Thank you,
Andras Kovacs
You would need to find a merchant account provider that supports the country you’re in and sign up with them. Then you’d need to get API information form them and integrate it into WooCommerce as a custom plugin. If you get to that point I could get you a bid on building the plugin for you.
how do you turn of
the guest checkout option?
WooCommerce’s general settings has a place to enable/disable guest checkout. Beyond that, you can also enable/disable it in the Express Checkout settings panel as well as in your PayPal account profile. It’s sort of a mixture of all those that makes it kick in, but having it disabled in any one of those places should eliminate it from your checkout so they get the regular login screen.
Hi Andrew,
Thanks for this free plugin. I’m trying to set it up on my woocommerce site. And it works fine, unless the product price is below $4.50. Above that number, It takes me to the paypal page with options to login into my paypal account or pay by cc. No problems.
If it is 4.49 or lower, I get an error saying 11832 – Maximum amount of order is less than itemized amounts.
I also enabled the gift wrap and gift message options but those boxes don’t show up on the checkout page at all.
Any help would be greatly appreciated. Thank you.
Hi Misty,
That’s an interesting error. I’ll need to get a look at the logs that are getting generated, so you’ll need to make sure logging is enabled in the settings for Express Checkout and then run another test. Then please submit a ticket here, and include the log details.
thanks, this plugin is great!!!
my question may oe may not have to do with your plugin, but you or another one of your plugin users might have some insight for me:
With paypal express (using your plugi), is it possible to finish the transaction on paypal and not have to return to my site for confirmation?
Hi Noah,
Possible, yes, but this only works out well if you’re not dealing with shipping or tax that needs to be applied. If that’s the case, we could make it happen for you, but that option is not (yet) available in the plugin.
I do have this on my list for our 1.2 update, but it may be a couple of months before that is released, unfortunately.
Wow, thanks for the quick response. The shipping and tax seem to be applied correctly to the paypal checkout when using your plugin for express checkout.
Would you still recommend that I wait for the next update?
Just installed your plugin and have it in Sandbox mode doing some testing with PayPal Express. However, when I add a product to my cart and then “proceed to checkout,” there is this error message at the bottom of my page: “Sorry, it seems that there are no available payment methods for your state. Please contact us if you require assistance or wish to make alternate arrangements.” Then, it won’t allow me to click the “place order” button (for non-PayPal orders). Clicking the Pay With PayPal button seems to work. I have it set up to allow credit card purchases in both WooCommerce and my PayPal account. What gives?
Hi Bob,
Express Checkout isn’t added to the regular list of gateways on the checkout page in the current version because the whole idea is that if they’re paying with PayPal they would skip all the forms on the checkout page anyway. I’ve had this request quite a bit, though, so I’ve added an option to enable Express Checkout in the checkout page’s gateway list.
It’s already done on my dev repo on GitHub. You can download it here. Just extract the files and upload the plugin folder to your web server, overwriting the current files.
Then when you go into the Express Checkout settings you’ll find an additional option for placement of the EC gateway.
Let me know if that doesn’t help!
Just checking to make sure I don’t screw something up, haha: do I overwrite the folder “paypal-for-woocommerce” with this new downloaded folder, which is named “paypal-woocommerce-dev”?
No, there should be another folder inside that with the same name: paypal-for-woocommerce
Ah, I take that back. Looks like the GitHub download is a little different. Sorry for the confusion. What you need to do is upload the contents of the paypal-woocommerce-dev folder to the paypal-for-woocommerce folder on your server.
That seems to have done the trick. Still need to fully test the sandbox, but thanks for your quick replies!
I cant see the additional choice for this.
I have created one order using Woocommerce-orders-add
Then i logged on my page and can see the order.
When i click “PAY” on recent orders, i get the same message. (there are no payments method….)
Any suggestions?
I’m not sure I’m following your situation. Please submit a ticket here and provide as much detail as you can. Screenshots are always helpful.
I did it, but i did it in the “contact form”.
can you please check that – because it was so much text and screenshot-urls..
Kind regards,
Roger.
great plugin! I am having issue with “Allow customers to checkout without a PayPal account using their credit card”. I have it checked and in paypal it is set to “PayPal Account Optional: on” yet when i proceed to checkout it asks users to register?
This could be caused by a number of things. You need to make sure your PayPal account profile has the “PayPal Account Optional” setting enabled. I believe it’s under Website Payment Preferences. Then you need to make sure Guest Checkout is enabled in the WooCommerce checkout settings tab. Then make sure the PayPal Account Optional setting is also enabled in the Express Checkout settings, as well as setting the Landing Page to Billing.
If all of those things are set and it’s still not working, it could be based on your country. Is yours defaulting to Nigeria, by chance, when you get to the PayPal checkout pages?
Yes i’ve checked all those options more than 10times. they’re all correctly set. Infact the regular woo cart works just fine except it exposes your email for free?(wth)
Yes its the country is defaulting to Nigeria on paypal..if i change it on paypal page from the dropdown list then it works fine. But that sort of confuses the user. Any workaround? Thanks for the prompt reply, highly appreciated!
That’s a bug (or at least what I consider a bug) in the PayPal checkout pages that has to do with the locale code getting sent in the API requests to PayPal. I’ve addressed this in my development repo already and it’s set to be included in the next update of the plugin.
If you want to grab it early you can download it here. Just extract the contents of that download and upload the plugins files to the /paypal-for-woocommerce folder on your web server replacing the files that are currently there.
Then when you look in the settings panel for Express Checkout you’ll find a few new settings, including the option to disable sending the locale code. This should resolve the issue for you.
seems to work fine with that update! Thanks again!
a quick off the topic question…how come your paypal checkout is responsive. is it pro account or mobile parameters sent?
The Express Checkout system will automatically switch to a mobile experience when it recognizes a mobile browser.
Dear Andrew, I am using WooCommerce in WordPress and Storefront theme. I have installed your brilliant plugin and have the latest version of everything in WordPress, WooCommerce, ExpressCheckout. I cannot for the life of me get the Visa/MC option to display for my website http://www.eugoods.net. I have checked all the settings on WooCommerce, your plugin, Paypal 100 times and cannot figure it out. The Paypal technical assistance said to check with WooCommerce support to get the “Solutiontype=Sole” settings for the API call, but I don’t see that setting in WooCommerce or your plugin. Would you please be so kind as to have a look at my WordPress/WooCommerce settings if I provide you with the login info? I would be forever greatful. I have read so many forums and blogs about it but cannot figure it out. I am located in Riga, Latvia and trying to sell products on my site from Latvia to China, so Chinese customers. My other site is http://www.eubabyfood.com, both sites have the same issue of not giving the customers a Visa/MC option without paypal. My contact info is info@eubabyfood.com or info@eugoods.net. Thank you for your time. Kind regards, Thuc from Riga Latvia.
Please submit a ticket here and provide temporary login credentials for your WP site. I can check your settings there. You also need to make sure that the “PayPal Account Optional” setting is enabled in your PayPal account profile under Payment Receiving Preferences (or it might be Website Payment Preferences.)
Can you please tell me how to populate billing name and address to be same as shipping name and address when customers use Paypal express?
That would have to be done in a custom plugin/extension or done directly in the plugin file. Are you comfortable with programming in PHP?
I’ve added this feature request to my list for our 1.1.7 release. It will probably be a couple of months before that’s available, though.
Hi, I am interested in same thing. I do not see the first and last name is order details that are returned from paypal. How can i get hold of this info?
We have completed this in our dev branch on GitHub already. If you want to go ahead and grab it you can download it here.
Hi Andrew! I work with people who have sites within WordPress Multisite. I have one gentleman who is getting this message when he tries to check out…10002 – Security header is not valid
He has assured me he put in his Paypal credentials several times and everytime it still won’t work. What would you suggest he try next?
Hi Jan,
The first thing to do would be to confirm the API request is getting the API credentials as expected. Make sure logging is enabled in the plugin gateway settings and then run another test. Then take a look at the log to see if the API credentials are getting entered as expected.
Andrew, is this enough from the log to tell you what’s going on?
02-07-2015 @ 14:19:37 – SetExpressCheckout API call failed.
02-07-2015 @ 14:19:37 – Detailed Error Message: Security header is not valid
02-07-2015 @ 14:19:37 – Short Error Message: Security error
02-07-2015 @ 14:19:37 – Error Code: 10002
02-07-2015 @ 14:19:37 – Error Severity Code: Error
02-07-2015 @ 18:41:49 – Start Express Checkout
02-07-2015 @ 18:41:50 – Test Mode: no
02-07-2015 @ 18:41:50 – Endpoint: https://api-3t.paypal.com/nvp
02-07-2015 @ 18:41:50 – Request: Array
Actually, I need to see the part below the Request:Array part so we can see the actual request. It will probably be easier if you submit a ticket here so we can work more directly.
Thanks, Andrew!!! I kept working with the gentleman and finally realized he didn’t have enough characters in his API Signature. I should have noticed that earlier. When I explained to him, he was able to get the entire Signature and it’s now working for him. Sorry for the inconvenience…I appreciate your willingness to help!
Hi! Thx for this great plugin. Just 2 questions:
I’ve activated the option “Show the Express Checkout button on product detail pages”.
1. PayPal image doesn’t resize for responsive design. Any idea how to fix this?
2. On product detail pages with variations the PayPal image shows up 2x (twice)
Pls. leave a short reply! Thank you!
1. This would need to be handled in your theme, and it’s recommended to make such changes within a child theme.
2. Again, this must be something about your theme or a conflicting plugin as I have not had this complaint from others and it’s not something I’m able to reproduce. If you want to provide a link to your site I can take a quick look to see if I can provide details on what CSS rule(s) you may need to adjust.
Hi,
I have a similar issue as Bob Downs above: “when I add a product to my cart and then “proceed to checkout,” there is this error message at the bottom of my page: “Sorry, it seems that there are no available payment methods for your state. Please contact us if you require assistance or wish to make alternate arrangements.”
I’ve enabled the Express Checkout in both PayPal and at Gateway Display Order. I have the latest version of your plugin. Should I still download the one from Github or it’s the same?
Is there any other setting I should do please?
Thank you!
The master branch on GitHub matches the currently released version. The dev branch is the current version + any updates that we’ve done but haven’t released yet. The dev branch is a little messy right now so I would avoid using that for the time being. If you want to submit a ticket here and provide temporary credentials to login to your WP admin panel I’ll take a look and see if I can figure out what the issue is.
Thanks for such a great plugin and it is available free.
I have installed this plugin, but i have an issue regarding which i have asked a few questions.
1.As i return from paypal, i have design the thank you page in which i have shown the billing address, but it seems doesn’t shown on this page?
2.Also when i return from the paypal, it also doesn’t login the user by default just like paypal standard checkout, also as i click on login and enter the same credentials but it dose no thing, because i have entered password for account creation on “Detail page” during my checkout but as i am trying to enter these credentials it does no thing.
Please help me i am really in trouble, that why the user dose not login by default when it return from paypal.
Thanks
1. Look in the Express Checkout plugin settings for the option to “Billing Address” option which says “Set billing address in Woocommerce using the address returned by PayPal.” This is necessary because the only address PayPal provides is a shipping address. If you want to populate data into the WC billing address then it’ll have to be that same address. Please check that and see if it helps.
2. I’m not sure I understand what you are expecting here. The system cannot auto-login a user into the WP/WC site. The PayPal login and the site login are completely separate, of course, so they would have to login on their own either prior to beginning checkout or on that review page.
If you’re saying that the site login on the review page is not working then we’d have to dig deeper into that. This is not something I’ve had any other complaints about, and I am unable to reproduce that myself, so there must be something unique about your site/configuration causing it. Can you try disabling other plugins to see if the problem goes away? At least then we’d know the culprit and could look to see if it’s a problem in our plugin or that one. Theme customization could also be causing an issue here. It’s really tough to say without seeing it.
Thanks for reply.
I am going to explain you my scenario regarding auto login.
During checkout with paypal standard while entering the billing and shipping information, there is also an option for “create an account” which take a password from us, so when we enter this password it will automatically logged in user, from where the user can view their order history, can edit their account etc.
This is the paypal standard check out process.
Now i have install the express checkout plugin, and just like with paypal standard, i also enter the password for account creation, but in this case as user return from paypal it cannot automatically logged in the user, and also when the user try to enter the same email address and password created during the checkout process, do not login the user, please guide me.
I have checked it, the billing information dose not saved in case of express checkout, while an other case it can save, so let me help how i saved the billing information with express checkout.
I have checked it, the billing information dose not saved in case of express checkout, while an other case it can save, so let me help how i saved the billing information with express checkout.
I think the account for user is not created in express checkout while when the user click on create account option and enter password.
I am pretty sure we have these issues resolved in our dev branch, which is just about to become out 1.1.6.3 update. I’m just running through some final thorough testing to ensure I don’t run into any other issues with cart totals. If you want to grab it early and give it a shot you can download it here. Otherwise, the official update should be released within a couple of days barring any unexpected issues during testing.
Thank you for reply.
So you mean that account creation issue will also be resolve in this new version or not?. Because i really need to create account for user as once user click on “create account” and enter their password, if this issue also resolved that would be great.
Also please help me that how save the billing information using function.php, please guide me that what hooks will be use to save these information.
Yes, the new version should resolve both of those issues.
Andrew, also please confirm that wither it create the user account or not as the user click on “create account” option.
Thanks, i have installed it now saved the billing address, but it still does not create an account for user.
I guess I need more details on exactly what you’re doing then, because that’s what we’ve been thoroughly testing and haven’t been able to reproduce it lately. Can you post a ticket here and let me know how you have everything configured so I can try to reproduce it?
Hi! I need HELP PLEASE!! I am trying to set up a PayPal on Woocommerce in South Africa!! Is there a step by step process to get it to work that doesn’t include having dollars? Any help and advice would be much appreciated!
Hi Bianca,
I don’t understand what you mean by “doesn’t include having dollars”..?? If you’re just trying to setup Express Checkout then this guide should give you everything you need to know. Please review and let me know if you have any specific questions.
Andrew thanks for this plugin. I am trying to implement this on my local setup first and once I finish payment on Paypal, I get redirected to the Cart page (without the payment being completed). When I look at the log file, I see messages about requiring the shipping address fields. I’ve hidden these as all I have are “virtual” products.
Could you help?
Please submit a ticket here and provide any details you have including log files.
Dear Andrew,
Thanks for your plugin.
I have the same issue as Karthik : after payment with paypall account it return to the checkout page with following error message: 10727 – The field Shipping Address1 is required. But I hav hidden these since this is not shipping product.
I tried to submit a ticket but opening an account on Angel eyes was a nightmare…I receive an email to confirm that turn to be a password changed and finally never succeed to open a ticket.
Therefore, I have no choice but to give up with so much complexity, and choose Stripe as the only and working payment method on my website (I mention that I have no personal interest in this alternative gateway but at least, It works )
I’m sorry to hear you’re having troubles. I’m not sure why the ticket system wasn’t working for you. We get plenty of support tickets for all our various products and haven’t heard any complaints. I do see notifications here from failed attempts to login, but the notifications I’m seeing are simply that the password was incorrect.
It sounds like you have some sort of a unique scenario going on where you’ve customized the WooCommerce checkout page..?? This is probably what’s causing the issue, but yes, we should be able to resolve it within our plugin code so that scenarios like this won’t cause that error. I’ll need to be able to reproduce it, though, in order to try and fix it.
I went ahead and manually fixed your account in our ticket system. If you want to work with me directly I’ll be happy to get this resolved so you can use it. I can tell you that conversion rates will definitely go up if you offer PayPal as a payment option on your site as opposed to Stripe alone. You could still use stripe for the credit cards, of course, but without PayPal as an option you will certainly lose buyers.
Look for an email from me with details on getting signed in if you want to try again.
Hi – I’m having trouble displaying the PayPal Express button on the cart page. Is there any code required in the theme cart.php?
As long as you have it enabled to display on the cart page in the plugin settings then it should show up just fine unless your theme is doing something to conflict with it. Are you sure it’s enabled?
I have this exact issue. Would love a solution as im missing out on sales.
Please submit a ticket here if you are experiencing problems and we’ll be happy to help.
The payment status doesn’t get updated in woocommerce. What is the IPN URL i need to use?
We have a separate free plugin, PayPal IPN for WordPress, that you can use to automatically update your WooCommerce based on payment status (as well as a number of other things you might want to automate based on different types of IPNs or different payment status values.)
Great videos, was just wondering why you put ads on those? Seems a little bit distracting from the valuable core message…
Free software and free support. Gotta try and generate revenue somehow. 😉
Hello Andrew,
Thanks for the plugin.
I have included all the credentials but it gave the error below
10001 – Timeout processing request
That can happen sporadically in the sandbox. Is it continuing to happen to you or is it only happening sometimes?
Hi I keep getting this error when trying to make test buy: There was a problem paying with PayPal. Please try another method.
I followed the guide and think I set it up correctly. What can be wrong?
I tride to check up on the API but it seems right.
Please submit a ticket here and attach the API logs saved by the plugin. You’ll need to make sure logging is enabled, of course.
Hi, is it possible to change image (Paypal Express) on Checkout Page?
Yes, there is an option to set a custom graphic for the checkout button from within the Express Checkout plugin settings.
thanks, but I’m talking about this icon /assets/images/paypal.png
For that one you would just need to replace the image that is currently at that location. In the future we’ll add a filter or an option to change that one just like the other one.
Hello how are you? I would like to rename the checkout button in payment methods, the name is “Place Order”, how do I change the name of the button?
WooCommerce provides a filter for that: https://support.woothemes.com/hc/en-us/articles/203544959-Change-text-of-the-button-Place-Order-
Hi Andrew,
is there the possibility to integrate the paypal payment window into my website?
I got the 10002 security problem too.
This can happen if you’re using a personal PayPal account instead of business or if there is something wrong with your API credentials entered into settings. Please check those things.
Regarding the gift wrap not appearing comment – I too had the same problem until I tried a desktop PC. It appears that PayPal don’t display the gift option on mobile devices – iPads etc. which is a bit inconsistent of them!
It would be nice if the gift message could come into the order as a field that can be printed in a packing slip. The way they come in at present in the notes means they need to be manually transcribed to a packing slip. But great plugin! Thank you!
Thanks for the feedback! I have added your request to move the gift wrap notes to a meta field in the WooCommerce order instead of adding it to the order notes. It will be included in our 1.2 release.
hi i have a question does the button also trigger Paypal App?
I do not understand your question..??
Hi,
I am trying to set up multiple business accounts for clients, and I need to manage the account, due to their inability to do so. Where would I find help for problems that may arise from this arrangement?
Thanks,
Steve
The only thing that could present a problem is if you’re logging in to the different accounts from random IP addresses, so between you and the client(s) you need to make sure you aren’t changing too much, especially if the IP shows the locations are very far apart.
Hi,
Love this plugin but am having trouble getting it to work! I can checkout with the PayPal Express it goes to PayPal and when I click on Pay Now I get processing then The http://www.newportladieslacrosse.com.au page isn’t working
http://www.newportladieslacrosse.com.au is currently unable to handle this request.
500
The link is trying to go to http://www.newportladieslacrosse.com.au/checkout/review-order/?pp_action=payaction&token=EC-XXXXXXXXXXXXXXXXX&PayerID=XXXXXXXXXXX
I have the option Enables the option to skip the final review page. Checked. Any advice please.
Please submit a ticket here and provide as much detail as you can.
Hello,
When paypal return to my site and I confirm my order, I get stuck with the error of missing phone number, but the phone is correctly insert.
With standard paypal this does not happen.
This is a problem because it does not confirm the order and then blocks the process of buying.
Can you help me?
I’m not sure I understand the issue here. Are you saying there is form validation occurring at that point?
When you get back from PayPal using Express Checkout with our plugin then you should simply be looking at a review page. It would just display any phone number included with the PayPal address details, but it wouldn’t be validating anything entered at that point, so I’m confused.
Can you do a video demo, by chance?
Would anything in WooCommerce 2.6 cause this to break? We are not getting the shipping address back from PayPal.
No, nothing in WC 2.6.x would cause that. Please submit a ticket here and we can work with you to figure out what’s going on.
Hi,
Have set-up Express Checkout and no buttons appear in the front end.
Its enabled, followed your setup instructions.
Please help.
Best regards
Edward
Please submit a ticket here and provide temporary login credentials to your WP admin panel so we can take a closer look.
Hello
We are utilizing paypal_pro_payflow for credit card processing on our wordpress site but when we try to also enable paypal_express it does not show up to provide our customers the choice to use paypal too.
You need to make sure Express Checkout itself is enabled, and then also check all of the settings within it. There are options to enable the EC button on the product pages, the cart page, at the top of the checkout page and/or in the regular list of gateways on the checkout page. You need to make sure it’s enabled in the areas you would like it displayed.
Hi,
I currently have a problem blocking the checkout process, when for example a customer enters a City: St.louis instead of Saint louis, the checkout fails showing the error : 10736 – A match of the Shipping Address City, State, and Postal Code failed.
How can i disable this verification ?
That is coming from Address Verification, which may or may not be available for you to disable in your PayPal. Log in to your PayPal profile and look for “Risk Controls” or “Fraud Management Filters”. Within that you should be able to adjust settings to help resolve that problem. It just depends on how your account was vetted when you signed up. On that note, you may have to upgrade to Payments Pro in order to get the fraud filters.
If you don’t either of those things in your profile I would recommend contacting PayPal and let them know what’s happening. They may be able to add variations of that city to help resolve the problem. I see similar problems happening with “Du Bois” vs. “DuBois” IA.
Hi sometimes getting this error as Payment error: 10536-The transaction was refused as a result of a duplicate invoice ID supplied. Attempt with a new invoice ID in Credit card(paypal_pro) and paypal is not redirecting back to the website.
There is an option in the settings for an order prefix. Set that to some unique value that would come before the actual order ID. This will avoid duplicates coming from different sources within the same PayPal account.
Hello i get this 10002 – Security header is not valid The live API are correct sandbox not check debug check
I cant find why get this ?
i saw your previous answer about correct API sandbox what else must check?
Thank you
That error always means that the API credentials are incorrect one way or another. It could be the values themselves, or it could be that you have live credentials entered in the sandbox fields or vice-verse. Please double check that, and if you continue to have problems you can submit a ticket here and we can help you more directly.
Recently we’ve been having problems with payments where we get the message that the Express Checkout Payer ID is missing error code 10419
I have changed nothing in the settings which worked previously. Any ideas as to what I can do to fix this?
Many thanks
That is typically caused from caching services conflicting with the session data in WordPress / WooCommerce. Are you hosting with WP Engine, by chance? This is very common with their servers. If not, clear out any caching / CDN services you have enabled for WordPress and then give it another try. Might even be better to temporarily disable those services altogether, then clear all your cache in browser, etc. and give it a try. It should work at that point.
Then you can turn the caching back and hopefully you’ll be good at that point. If it breaks it again you’ll need to figure out how to configure your caching tools so they don’t conflict with WooCommerce.
Andrew, is there a fix or alternative for WP Engine users? Can’t really disable their caching systems.
Just contact the and let them know you’re using WooCommerce and you’re running into problems with caching. In almost all cases they’ve fixed it immediately for people. If they give you any trouble let me know.
Hiya I’ve been having some issues with your plugin. Every time i try to purchase using PEC it returns a white window with just “-1”. The website is hosted with WpEngine and I contacted them to check if it wasn’t a cache issue and they confirmed everything was fine on their end. The website is https://www.itshandmade.co.uk/ and the error we get is http://screenshot.co/#!/f42b2f3e38
It would be best to submit a ticket here for this sort of thing. What you’re seeing usually means there’s some sort of a PHP failure happening. Can you check the PHP error logs on your server to see if it shows anything? Also, can you try temporarily switching to a basic theme and disabling other plugins to see if the issue goes away? If so, then you can re-enable things one-by-one until the problem comes back to find the culprit. Please give that a shot, and then create a ticket using that link provided and let us know the details of what happens. Thanks!
Hi,
I’ve recently downloaded and installed the plugin, activated it and enabled PayPal Express Checkout by following all the steps. However no changes reflected on my website. I am sure that I didn’t miss anything. Is there any additional configurations to be done? ‘API signature” is it the same as ‘Finger Print’ ?
Please Help me
Did you follow our setup guide? It provides links to quickly obtain your API credentials. I’m not familiar with where PayPal ever uses the term “Finger Print”, so I’m not sure what you’re pulling, but the links in the doc as well as in the setup screen itself will send you directly where you need to be for pulling those credentials. Then, there are options in the Express Checkout settings page that allow you to adjust how and where the PayPal button is displayed on the site. Be sure to review these options carefully for displaying on the product page, cart page, and checkout page. If you continue to have problems please submit a ticket here.
Hello Andrew Angell, great plugin and I appreciate your effort 😉
I have the same problem. I switched off PayPal Express and activated PayPal Standard and it has appeared this payment method. I think there is some problem in the plugin.
I have WordPress 4.7.2 and Woocommerce 2.6.14. Someone has also the same problem?
Which problem are you referring to? Please submit a ticket here and make it clear what issue you are having and we’ll be happy to help. Thanks!
The problem is that after I have activated the plugin, it doesn’t appear PayPal as an option at Checkout page.
I have already opened a ticket. Thank you!!
I have set up the paypal express option. everything is ok except that the phone number entered in the paypal window is not updated in the woocommerce invoice and order details.
did I miss something?
If the phone number is getting added during checkout it should be getting included in the WC order details. If you don’t have the “Require Phone Number” option enabled in the PayPal account profile, though, it may simply not be asking your buyers for it. Please check that. It should be under “Website Payment Preferences” or “Payment Receiving Preferences” in the PayPal account profile.
Hi,
I set up the Paypal Express checkout, and received the order confirmation via email.
But when the customer clicks the Pay now button in paypal, it redirects me to an error page.
Warning: Missing argument 1 for WC_Checkout::create_order(), called in …/wp-content/plugins/paypal-for-woocommerce/classes/wc-gateway-paypal-express-angelleye.php on line 1200 and defined in …/wp-content/plugins/woocommerce/includes/class-wc-checkout.php on line 262
Warning: Invalid argument supplied for foreach() in …/wp-content/plugins/woocommerce/includes/class-wc-checkout.php on line 289
Warning: Cannot modify header information – headers already sent by (output started at …/wp-content/plugins/woocommerce/includes/class-wc-checkout.php:262) in …/wp-includes/pluggable.php on line 1179ndaydreamso
Are you running WooCommerce 3.0? If so, you’ll need to wait for our 1.4.0 update for full compatibility which should be ready within a week or so. Otherwise, you can use WooCommerce 2.6.14 and our plugin will work fine. Then you can update both when you see our 1.4.0 release.
When is the exact date for the update to version 1.4.0?
I can’t provide an exact date right now. All I can tell you is we’re making good progress on it and we hope to have it released within a week.
When is 1.4.0 coming out? I have a client site that keep throwing errors.
Warning: Missing argument 1 for WC_Checkout::create_order()
We’re planning to be releasing it on Monday or Tuesday at the latest. We aren’t going to quite make it by the end of this week as hoped.
I get the following when i click complete order in sanbox testing:
Fatal error: Uncaught Error: Call to a member function is_type() on null in /homepages/1/d646790031/htdocs/app679128897/wp-content/plugins/woocommerce/includes/class-wc-cart.php:543 Stack trace: #0 /homepages/1/d646790031/htdocs/app679128897/wp-content/plugins/express-checkout/includes/class-express-checkout-api-request.php(288): WC_Cart->get_item_data(Object(WC_Order_Item_Product), true) #1 /homepages/1/d646790031/htdocs/app679128897/wp-content/plugins/express-checkout/includes/class-express-checkout-api-request.php(181): Express_Checkout_API_Request->ex_get_item_description(Object(WC_Order_Item_Product), Object(WC_Product)) #2 /homepages/1/d646790031/htdocs/app679128897/wp-content/plugins/express-checkout/includes/class-express-checkout-api.php(80): Express_Checkout_API_Request->ex_do_payment(Object(WC_Order)) #3 /homepages/1/d646790031/htdocs/app679128897/wp-content/plugins/express-checkout/includes/class-express-checkout-gateway.php(246): Express_Checkout_API->express_checkout_authorization(Object(WC_Order)) #4 /homep in /homepages/1/d646790031/htdocs/app679128897/wp-content/plugins/woocommerce/includes/class-wc-cart.php on line 543
Did you update WooCommerce to 3.0.4 and PayPal for WooCommerce to 1.4.0? Updating both should resolve this.
Does your plugin support the multicurrency features offered by Aelia currency switcher plugin?
Yes, I’ve worked with the developer of that plugin on this and we’ve gotten lots of good feedback from people using both plugins together successfully.
That’s great. I’m asking because I could not find a way to enter multiple account IDs in Braintree gateway. Is there a way to do it? Thanks
My Store is in different currency other than paypal currency (USD) , On checkout page , it says – Unsupported currency. Is there anyway i can convert my store currency to USD and process payment via paypap express checkout. Pl help.
I know there are quite a few people having success with this plugin: https://aelia.co/shop/currency-switcher-woocommerce/
Hi there,
I have a bit of an issue but can’t see where to change this if possible.
I use gift cards on my site but when this takes the total price to £0 the paypal button disappears as it should, but it does not then how the proceed to checkout button.
In summary if I use a gift card I can not make a purchase or complete an order. Is there a setting or way to force the checkout to show the default woocommerce button if the cart total = 0. Thank you.
Please submit a ticket here so we can help you more directly with this.
Braintree and many other gateways your plugin sets up doesn’t see to support Woocommerce Subscriptions. I know that the Woocommerce Subscriptions page does indicate that Braintree supports subscriptions in general. Does your implementation for Braintree not yet support it?
See https://www.screencast.com/t/e0WJ4T1a
Which version of our plugin are you running? Our latest version does support subscriptions, and we’ve had plenty of reports of people using it successfully.
I get the following error email sent to me with the message: PayPal SetExpressCheckout API call failed
Do you have logging enabled in the plugin settings? Please make sure it’s enabled, then reproduce the error, and submit a ticket here with the log file attached. We’ll be happy to look into this in more depth with you.
I am a Nigerian merchant whose business serves people in different continent. I write to know if I can use PayPal Express Checkout to receive payment from my customers.
Thanks
PayPal business accounts aren’t going to work well in Nigeria, unfortunately.
Thank you so much for this very helpful set of instructions. This helped me fix a few issues I was having.
I do have one issue that it didn’t fix but I’m not sure if it’s related to the plugin or PayPal itself; I thought I’d check with you first:
I’ve enabled the options that allow customers to pay using a credit card without a PayPal account. But even though I have the billing landing page enabled when I do a test transaction through the sandbox, it still requests the customer to sign up for an account. (It is clearly a different page to the login page though as this is what I originally had set) Is there an option in your plugin that I’m missing? I’ve only just upgraded to a business PayPal account so there could easily be a setting in there I’ve not yet found…
I’d really appreciate any assistance you could provide.
Actually sorry to be a pain. I’ve just found the issue. I had checked ‘enable PayPal billing agreement’ on the product page (because I didn’t know what it was) but having now read your product settings help page I’ve disabled that and it fixed the issue.
Thanks again and sorry to waste your time!
Glad you got it worked out and were able to find the answers in our docs. 🙂 Let us know if anything else comes up, and if you have a moment to leave a review for the plugin it would be greatly appreciated. Thanks!
Hi Andrew, I have been successfully using PP Express on my site for a couple of years. However, in just the last 24-48 hours when someone clicks on the PP button to pay it returns to the cart page. What can be done to fix this? Thank you very much.
FYI, the button links to “http://www.streetrodplans.com/?wc-api=WC_Gateway_PayPal_Express_AngellEYE&pp_action=set_express_checkout”
Andrew, I think I solved it. When I disabled allowing coupons, since none currently active, it worked. Hope this is the solution.Everything’s been flawless so far. Maybe just my own sloppiness. Thanks again.
Hi John,
Glad you got it worked out. Allowing coupons shouldn’t be causing any issue, though, so we’d need to dig a little deeper to figure out what’s going on there. It could be conflicting plugin, caching issue, or a number of things. Tough to say without getting into it. Let me know if you have any more questions or concerns about it in the future. Thanks!
Hi, I just enabled paypal express checkout for single product pages, cart page and checkout page. But in all these pages, the paypal button doesn’t show up. Not sure if something wrong with my side. It’s woocommerce version 4.8.2 and php version 7.0.23
Thanks!
There is also a product-level option to enable Express Checkout (separate from the global option to enable on product pages.) Please go into Settings -> PayPal for WooCommerce -> Tools Tab. In there you’ll find a Bulk Updater so you can enable Express Checkout on all of your products. Please try that and let me know if it helps. If that doesn’t help, please submit a ticket here and provide a copy of the theme you’re using so we can try to reproduce the problem.
Hi Andrew,
I have the exact same problem as Cindy (sent on Sept 30, 2017). I have woocommerce version 3.4.2 and PHP version 7.1.18, and i’m using the Entrepreneur theme from Themovation. When I enable paypal standard the button shows on the checkout page, but when I enable paypal express checkout … everything stops. I don’t even have a checkout button on the cart page, although everything is enabled and made the settings you recommended in Settings. Any idea what could be the problem?
Thank you!
Hi Daniela,
It sounds like you need to double check all of the options in the Express Checkout settings panel. There are some options specific to how and where the buttons should be displayed (ie. product pages, cart page, checkout page.) If you feel it’s all setup as you want, but you’re not getting what you expect, please submit a ticket here and we’ll be happy to take a closer work with you. Thanks!
Hi Andrew,
Visitors to my client’s website do not have to put in their contact information in the Woocommerce Store…bypassing the Checkout page, I think. He only allows checking out by way of your plugin…going through PayPal. Is there any way to set up taxes to be charged only for Pennsylvania, where my client lives? Would Geolocate work? Will nothing work to set up taxes? Can Paypal apply the tax information? Hope this makes sense. ~~ Thank You!
Hi Jan,
I’m sorry for the delay responding. Somehow I missed this notification. With Express Checkout the shipping/handling/tax rules would be applied on the review page displayed after being returned to your site from PayPal. You need to make sure the “Skip Final Review” option is not enabled in the Express Checkout settings. Please check that and let me know if it helps. Thanks!
I am getting a timeout issue when customers pay by card, some don’t end up paying at all and some keep paying for the same order as they didn’t think it had gone through. Any ideas?
Hi Antony,
So people are using Express Checkout with Guest Checkout to pay with a credit card, right? Where exactly is this timeout happening? Is the review page on your site loading and it happens when that gets submitted? Or do you have “Skip Final Review” enabled and it’s timing out upon return from PayPal so they never see anything at all at that point? It would actually be best if you can submit a ticket here and provide these details so we can help you more directly. Thanks!
Great plug-in! Really appreciate the option to add the button to checkout, but is there a way to customize where it is hooked in on the checkout page?
For example have I would like it displayed in the woocommerce_checkout_before_customer_details section instead of woocommerce_before_checkout_form
Hi Jerry,
I’m sorry, but we don’t have any options to adjust the placement other than what’s available now. Feature requests like this would be best posted on the GitHub repo: https://github.com/angelleye/paypal-woocommerce/issues
I am really struggling to get this WooCommerce PayPal Express Checkout Gateway plugin working. Are you the Author of it? The first of them was an error message that I’ve searched and found zero info on “Error (3): xxxx”. There are more issues but I’d like to confirm that I’ve come to the right place.
Ours is “PayPal for WooCommerce” by Angell EYE. It sounds like you are using one built by somebody else. I would recommend installing hours and it should go much more smoothly for you. Of course, if you do have any problems we would be happy to help.
With the checkout page skipped, submit order goes right to PAYPAL. I understand this is said to improve conversions, but it’s not letting some of my cart upsells to display without that page before checkout. If customers fill out the forms first, does that information pass over to paypal on the next step or do they have to fill out twice?
Yes, if you pass people through your checkout page then that data will pass over to PayPal.
Hello!
I’m trying to obtain the live API username, password and signature for your PayPal Express installation. I click on the “this tool” link, which takes me to my active business PayPal account, with options for “Prebuilt”, “Braintree” or “NVP/SOAP” displayed. Which do I select? If “Prebuilt”, what third party username do I enter? What do I enter on my site for the Live API username, or will this be provided by PayPal?
Thank you!
Looks like they’ve made some changes with the way that flow works. I’ll have to adjust our links and docs accordingly. What you want to pick, though, is NVP/SOAP. Then if it asks for Signature or Certificate you want to choose Signature.
So easy (when you know what you’re doing) 🙂
Up and running.
Thank you!!!!
Happy to help!
Hi,
in my settings page, not option Checkout Button Type.
Why
I’m not sure I understand your question. Can you please elaborate on this?
Hello.
Your ad-don is great but i need an option to change the button sizes(pay-pal express button) and also style, can you add it ?
Also i need to change the sizes in the gateway menu(on the website checkout page) cause right now the stripe payment is in regular size and the pay pal is really big and it’s look bad.
Please add this features thanks.
There are options in the settings that allow you to set your own image, so you could make one whatever size you want and replace it. Also, you could make adjustments to the CSS in your theme to adjust anything about sizes or placement as necessary. Let me know if you have any specific questions about that. Thanks!
Hello Andrew:
First of all I want to thank you for the amazing plugin.
I have activated Paypal Express Checkout. I also activate the “Enable Paypal IPN” and put the notification URL as Woocommerce documentation explain.
1) From 12 orders, 11 are “Pending” and only one was “Processing”. I check the IPN History on my PP Account, there is only one record for the order with “Processing”, but the status is “retrying” 13 times and HTTP Response 500. But the money was transfered to my account. The other orders don’t appear on IPN History even with Failed filter.
2) Checking the log_file I could see “SetExpressCheckout” call were made for all orders but only one “GetExpressCheckoutDetails” and “DoExpressCheckoutPayment” call was made for the order mentioned above. Are my customer closing the window or is a technical issue?
3) Do I need to install the IPN for WordPress plugin? or is a deprecated plugin. Correct me if Im wrong, the “Enable Paypal IPN” on Paypal Express Checkout replace that IPN for WordPress plugin, am I correct?
4) I read on a forum that custom permalink might cause issues with IPN, but as I see, the correct URL notification was set on the log file for the successfull order.
5) My site is hosted on Bluehost Shared Plan, I’m not 100% sure but I read on some forums the firewall could block the IPN. Did you see other people facing the same issue with Bluehost?
I’m very lost here man, if this become a complex issue, do you have time to check my site (Pay work of course)?.
Thanks very much for your time and great work !
Hi Carlos,
1) This means the IPN is failing. Unfortunately, this is common with the built in IPN solution that comes with WooCommerce. We have a separate plugin for IPN that is a lot more powerful and lets you do all sorts of things with IPN beyond simply updating the WooCommerce status. That could be used to update the WC order status properly, but you would have to code a custom hook for that. We have a guide on how to do this here.
2) If you see SetExpressCheckout without any following GetExpressCheckoutDetails or DoExpressCheckoutPayment, then yes, that means the user mostly likely closed the browser after loading the PayPal checkout and didn’t complete the process. That would not trigger an IPN, though, since no transaction has yet occurred, so that would not be related.
3) The “Enable PayPal IPN” option in the PayPal for WooCommerce gateway settings are meant to be used if you already have your own IPN solution in place that you would like to use. So what you did was technically correct, but the built in WC IPN solution just doesn’t work very well. As such, you need to build your own, and that’s where our IPN plugin comes into play as explained above.
4) Yes, custom permalinks could cause an issue if it’s rewriting the URL that IPN is using. You could always try turning off your permanlinks temporarily to see if that resolves the problem. If so, then adjust your permalinks to ignore the IPN URL.
5) This should not be an issue. I think your problem is that the the built in IPN in PayPal Standard provided by Woo just doesn’t work very well, unfortunately.
I would recommend installing our IPN plugin, setting its URL as the default URL in your PayPal profile, and removing the WC IPN URL from our gateway setting. Then you’ll need to follow that guide to update your order status, and you should be set!
I’m trying to get my settings and I keep getting a please enter a valid API Username. What is the Third Party Permission Username that I need to enter into PayPal in order to grant API
You do not want to setup third party permissions. You want to create your own API credentials so you’ll have your own API username, password, and signature. This link should take you directly to the API credentials in your account. Just log in with your PayPal account, and if it asks you anything about Certificate vs. Signature make sure to choose Signature. Then it should return the three values that you need to copy/paste back into the plugin settings. Let me know if you have any troubles with that.
Love that the plugin allows express checkout for subscription, but i’m struggling with it.
It seems to not be working well for a couple reasons:
1. If I checkout with a non subscription product and select a different billing and different shipping address, my order details and woo confirmation email show me the two different addresses. The fulfillment company also gets the correct shipping address and I don’t get directed to the order review page since I checked this box to bypass that step.
However, if I checkout with a subscription product, I not only get sent to the review order page after checking out with paypal, It also looks like the billing address overrides the shipping address every time, regardless of if I sign into my paypal account or checkout as a guest with a CC. The fulfillment company then receives the wrong shipping address. Interestingly enough, when I reach the paypal checkout, under SHIP TO, it shows the correct shipping address. I just don’t know what happens between paypal and the order review page. The shipping address gets overridden somehow.
Hmm, this is odd indeed. It would be best to submit this to our support help desk as opposed to this general comment area. Please create a ticket here and provide these details. We can get a developer assigned to figure out what’s going on here. Thanks!
Hello,
For some reason when a customer pays with Pay Pal, I don’t receive the New Order Notification email. I only receive notifications from credit card purchases. I do get a Pay Pal notification but it does not contain the order details, only a payment amount.
I’m sorry for the delay getting back to you. Order emails are triggered by WC itself based on the order status updates. Is your order getting left in pending status by chance? Or is it updating to Processing as expected? Have you checked the spam folder to see if they’re going there?
Im also getting the error :
[ACK] => Failure
[VERSION] => 124.0
[BUILD] => 000000
[L_ERRORCODE0] => 10002
[L_SHORTMESSAGE0] => Security error
[L_LONGMESSAGE0] => Security header is not valid
[L_SEVERITYCODE0] => Error
API creds are correct.. Logs don’t tell me much else.
That error means that one way or another the API credentials are incorrect. Double check your values and make sure you are not sending sandbox credentials to the live server or vice-versa.
Hello. Recently my paypal express button is no longer showing on the cart page and I also cannot update my basket. I can’t find information on why this might be.
Did you just recently update to our 1.4.8.x version? Did you make sure to clear any caching / CDN tools you might have running after applying updates? Did you activate the new Smart Buttons functionality in the latest updates?
Hi,
I updated the plugin today and having problems. When my customers are in cart and click on paypal, nothing happens and goes back to homepage. It was working fine prior to the update.
Thanks
Hi Chris,
I’m sorry for the issues. We actually just released a 1.4.8.9 follow-up that should resolve the issue you are having. Please apply that update and make sure to clear any caching / CDN services you might have running in WordPress or directly on your server. Then give it another try and let me know if you continue to have problems. Thanks!
Hi,
Is there a way to disable shipping address in Paypal page? I am selling e-books and do not require a shipping address. Customers get confused at Paypal page as to why this requires a shipping address. I do require them to login and create an account so I have disabled guest checkout option in Woo.
Thanks in advance for your help and great plugin!
In WooCommerce at the Product level you can check the box for “No Shipping Required”. This will make it so that the PayPal checkout for that product does not include anything about a shipping address. If you need to apply this to multiple products at once you can use the Bulk Update tool located under Settings -> PayPal for WooCommerce -> Tools.
Hi Andrew,
I installed the plugin last week before the last update, but as soon as I activated it the paypal express button (or any checkout button) no longer showed on the cart page. So i have no checkout button right now. My WooCommerce version is 3.4.3. and the status says “paypal for WooCommerce – not tested with the active version of woocommerce”. I installed the update you released last week but nothing changed. (My php version is 7.1.18.) I deactivated the theme and tried Twentyseventeen, but that didn’t work either, so i don’t think it’s a theme conflict. Do you have any ideas why this is happening and how it can be fixed?
Thank you!
Hi Daniela,
For future reference, it’s best to submit a ticket here for things like this. We can work with you more directly there and figure out what’s going on. The first thing I would double check, though, is the settings in the Express Checkout gateway for our plugin. There are options specific to display on the product pages, cart page, and checkout page. Make sure those are all configured the way you want. Then also make sure you have cleared any caching / CDN plugins you might be using, and then you should start seeing the buttons as expected. If not, try disabling the Smart Buttons option and see if any buttons show up for you then. If so, then that would lead me back to a caching issue.
If you aren’t able to get it worked out that way please use the link above to submit a ticket and we’ll work with you more directly to figure this out. Thanks!
Thanks Andrew for the quick reply! I made the changes but the problem is still there. I’ve submitted a ticket. Thanks for your help!!
I hope this is what I think it is I really need the help right now
Express Checkout specifically will add PayPal Smart Payment Buttons to your site, so people can checkout from the product page, cart page, or Woo checkout page. If you have any specific questions just let us know.
Hi, I noticed that installed the plugin I have a problem with unregistered users. That is, if a guest user wants to proceed with the purchase with paypal express checkout, this is redirected on the cart page. While if a registered user proceeds to purchase … he is redirected to the paypal page.
Is there any solution or indication to be made?
Thank you
I’m not fully understanding the problem. Are you saying that if you aren’t logged in to your site you can’t checkout with Express Checkout?
No … the problem is much easy. If a user not registered to the site proceeds to pay an order with paypal express checkout method, after click “Proceed to Paypal” is redirected back to the cart page instead of redirecting to the paypal page.
while this problem does not happen if the user making the payment is already registered to the site.
test yourself as a guest user and tell me if you can make the payment… thanks
I am not able to reproduce that on my test sites, and we don’t have any other reports of it. Are you running any caching / CDN services? Can you temporarily disable those to see if the issue goes away?
no the test was on my site in question … to see the problem I mentioned
let me know, thanks
Just yesterday I received a notification from the plugin:
PayPal Express Checkout Error Notification
PayPal DoExpressCheckoutPayment API call failed
Error Code: 10730
Error Severity Code: Error
Short Error Message: Shipping Address Postal Code Empty
Long Error Message: The field Shipping Address Postal Code is required
Queti alerts with the standard plugin I have never happened … why do you?
Do you have logging enabled in the plugin settings? We’d need to get a look at the full log to see. I think that error would only happen if it’s including most of the address but leaving out the postal code, in which case there must be something going on with the checkout form on your site that’s somehow causing that as we are not seeing any other reports of this. We can help you more if you submit a ticket here with any logs you can provide.
I’ve created a ticket … I’m waiting for your answer
hi I’m using this plugin but when cutomers make payments with paypal it says error : Your payment could not be processed at this time. Please try again later.
Return to merchant
At this time, we are unable to process your request. Please return to and try another option.
please help with this solutions . my customers facing this issue
Have you been using the plugin successfully and then this just started happening, or are you setting it up for the first time? Is your PayPal account a Personal or a Business account?
Hello,
I just installed the plugin and when i’m testing the checkout process WooCommerce does not show [Check out] on shopping cart page with this plugin further more the PayPal Button when enabled and clicked will result in a split second paypal pop-up that closes before it even makes it to 1-1/2 second. I’ve entered everything needed in settings. PLEASE HELP we need to move from our out of business shopping cart to Woo and need PPE to work!
Please make sure to double check all of the options in the Express Checkout settings. There are options in there for specifically displaying the PayPal button in various places, including on the shopping cart. If you still can’t get it to show up please submit a ticket here and we can help you more directly.
Nicely explain, though I admit that first time I got lost on the fourth step, thankfully I found a very good tutorial on Wpblog and things got much clearer from then on.
Hi Bram,
Yes, I need to update that so it’s more clear what’s going on there in Step 4. It’s basically just displaying all of the individual options the plugin provides and giving you details about each one. I could make that more clean, though.
I’m curious what tutorial you found at WPBlog..?? Was it specific to our plugin, or did it just help you understand how to setup our plugin after you read it?
Hi there! The “CHECKOUT” tab in settings is not showing up for me to set things up as outlined in these instructions.
Sorry for the confusion. Since we published this doc Woo changed it from Checkout to Payments. If you click into the Payments tab the rest should follow along as expected.
When loading the settings page for Express checkout I get warnings in Chrome and Edge
util.js:71 Cross-Origin Read Blocking (CORB) blocked cross-origin response https://www.paypal.com/xoplatform/logger/api/logger with MIME type text/html. See https://www.chromestatus.com/feature/5629709824032768 for more details.
While sandbox tests work fine any real attempt by various cards or balance always give error at final stage of:
10417 – Instruct the customer to retry the transaction using an alternative payment method from the customers PayPal wallet. The transaction did not complete with the customers selected payment method
Paypal simply said they are not halting any of the attempted payments and said try another browser. Very insightful. Any ideas? Thanks
Here is the info PayPal provides for that specific error:
Are you working with Woo Subscriptions / token payments?
Hi Andrew, thanks for your reply. I am not using any memberships it is just a simple listing purchase. I downgraded to Paypal Standard to see if that worked live, as it did in sandbox. When being taken to the paypal login page on that from the checkout I would get this error in chrome/edge on loading:
hermes?token=2SB63218T9194151X&useraction=commit&rm=2&mfid=1553868508850_fb2b2bd53fb44:formatted:1 Access to XMLHttpRequest at ‘https://www.paypalobjects.com/js/xo/hermes/1.9.0/framework-code-split.js’ from origin ‘https://www.paypal.com’ has been blocked by CORS policy: The ‘Access-Control-Allow-Origin’ header contains multiple values ‘*, *’, but only one is allowed.
If I click on the line beginning hermes?token it highlights the on line 1 with the red cross.
If I continued to login and pay with any method including positive preloaded paypal balance/bank account or various credit or debit cards in my long established personal paypal account I would always get:
xhr-ads.min.js:1 POST https://www.paypal.com/webapps/hermes/api/checkout/9V432058V9438291X/session/createPayment 400
Clicking on the createPayment part in red gives:
{ack: “contingency”, contingency: “PAYER_CANNOT_PAY”, errorData: {}, meta: {calc: “d53d354e95631”,…},…} ack: “contingency” contingency: “PAYER_CANNOT_PAY” errorData: {} meta: {calc: “d53d354e95631”,…} calc: “d53d354e95631” rlog: “uQOsPRKX%2FlpGH68Bs3UtNYZH1BnB%2BPEBYPgZ6QrAXx7Tpk8LNopyinjpkztEirKmJAqc0t4CpYjJ8zMVulKh%2Bw_169c9dc24e8” server: “AGgtMZPJyhRhqkE5HZ4y4e3o3H9rek-_6MKhCm9XfiwYd3ikRZkk03jbrSNs9rFvhbd5UvSfYPbUQiv_2VdQgDzpfC3DBY8IIHcnRPMFGcIYMy7YYIynzyA3KAx0UAG8g2S-6ZgBp9UEQQqRMb0T5L87JBeWgAFSsDJroZ7M2cZwgiTiprDNUyUKaSMvMITYLLgZ0sEQiV2kv-17-6DmYtwjqTdI5GT56zyexZkdkkHFMKvttaV9Ec_n91no_XpYKuTMQFSo3nWAAJEudmGtztjWAy3nuIWm”
I have sent this to paypal merchant tech support and await their response.
Do you think the two issues with CORS blocking some data and the payment not being created are linked? Thanks.
Did you get a reply from PayPal? This sounds like a server configuration issue, or possibly a browser extension issue. Have you tried in a different browser that you don’t use often to see if it works better there?
Hello,
In this site when i try to paywith paypal express i fill all billing details perfact but in paypal site country and state is show blank there.
Please give some solution regard this.
Thanks in advance
I am not clear on exactly what you are reporting here. Are you filling out the Woo checkout page with a billing address and then using PayPal Express for payment? Are you saying that all of the info is filling in to the credit card form displayed on PayPal’s checkout page except for the country and state?
yes which i filling in woocommerce checkout page only country and state is not set there which i pass from my site
You can see https://plusus.com.au here.
all filed in checkout page is pass to paypal site except country and state
HI can you please give me any solution.
Yes in paypal checkout page country and state data is not set which i fill in woocommerce checkout page.
Hi Jasmin! Did you manage to find a solution to that problem? Thank you for taking the time to respond.
Hi Robert, are you filling out shipping info on the Woo checkout page before going to PayPal?
Sorry I never replied here. For some reason I didn’t see any notice about your responses back after my last response.
Are you filling out a shipping address on your WC checkout page before getting sent to PayPal?
Have the same issue. The address information returned from express checkout can return blank in “state” field. Maybe it is not required in the Paypal form.
This happens when you have the Customer Base Address configured to use Geolocate, but you don’t have MaxMind configured properly in the Woo settings.
Under Woo General settings, just set the Customer Base Address to “no default location” and this problem won’t happen anymore.
Either that or go ahead and configure the MaxMind stuff if you do want to use it.
can I change the position of the Paypal express button?
Move-in step 1: Proceed via an Express option.
Please give me a solution for this.
Please check the screenshot: http://prntscr.com/q6f5yo
Is this a custom theme you’re working with? I think you would just need to adjust the hooks that you’re using to output that first step so that it shows up above our PayPal buttons. If you want to submit a ticket to our help desk and provide some more detail on that we can try to provide better info for you.
To accept online payments using PayPal Express Checkout, you must have a Business or Premier PayPal account. See PayPal account setup for recommended account settings.
hi, Angell Eye
I am using “woo commerce PayPal check out gateway” plugin there’s an issue
it shows this error:
“Don’t see the secure PayPal browser? We’ll help you re-launch the window to complete the purchase”, And then disappears and nothing happens. I am using version 2.0.3
That’s an old version. We are on v2.3.6 now. I’m not sure if that will fix it, but that’s the first thing I would try. Make sure you have our Updater installed in order to receive updates.
When I click https://www.paypal.com/us/cgi-bin/webscr?cmd=_login-api-run to Create an API Username, Password and Signature there is an error. Can you please update your knowledgebase article for setting this up?
Hi. It’s still loading okay from what I can see. What error are you getting? It could be an account specific issue.
Hi,
i am paypal for woo-commerce plugin with CheckoutWC plugin, but there are 1 issue, after finishing pay,ent with paypal when we try to place order its send back to cart page. please suggest.
I am not seeing any other reports of this. Please submit a ticket to our help desk and provide temporary login credentials so we can take a closer look.
Hi, I’ve checked the single product buttons options, but the buttons doesn’t appear on my single product page, whereas it appears on cart and checkout page
Hi Kelvin,
I apologize for the delay replying here. For future reference, it’s best to submit a ticket to our help desk at https://angelleye.com/support
There are product level options for enabling/disabling the PayPal buttons as well. You can adjust this for multiple products at once using our Bulk Update tool located under Settings -> PayPal for WooCommerce -> Tools Tab.
Let me know if you have any questions or concerns about that.
Thanks!