Introduction
In this tutorial, we will learn how to configure the Gravity Forms Braintree Payments plugin to accept Automated Clearing House (ACH) payments in your Gravity Forms.
After following the steps shown below, you will be able to accept ACH payments from both Checking and Saving accounts.
We will also show you ways to enable both direct Credit Card and ACH payment in your Gravity Form.
This way, you can let your customers choose the payment mode and let them make the payment accordingly.
Braintree Payments for Gravity Forms
To follow this guide you will need a Braintree Payments account and our FREE Braintree for Gravity Forms plugin.
Important!
Before you get started with this tutorial, you need to have ACH payments enabled for your Braintree account to be able to accept ACH payments. And to do that, as of now, the only option is to get in touch with a customer support representative at Braintree.
1. Set up API Credentials in Gravity Forms Settings
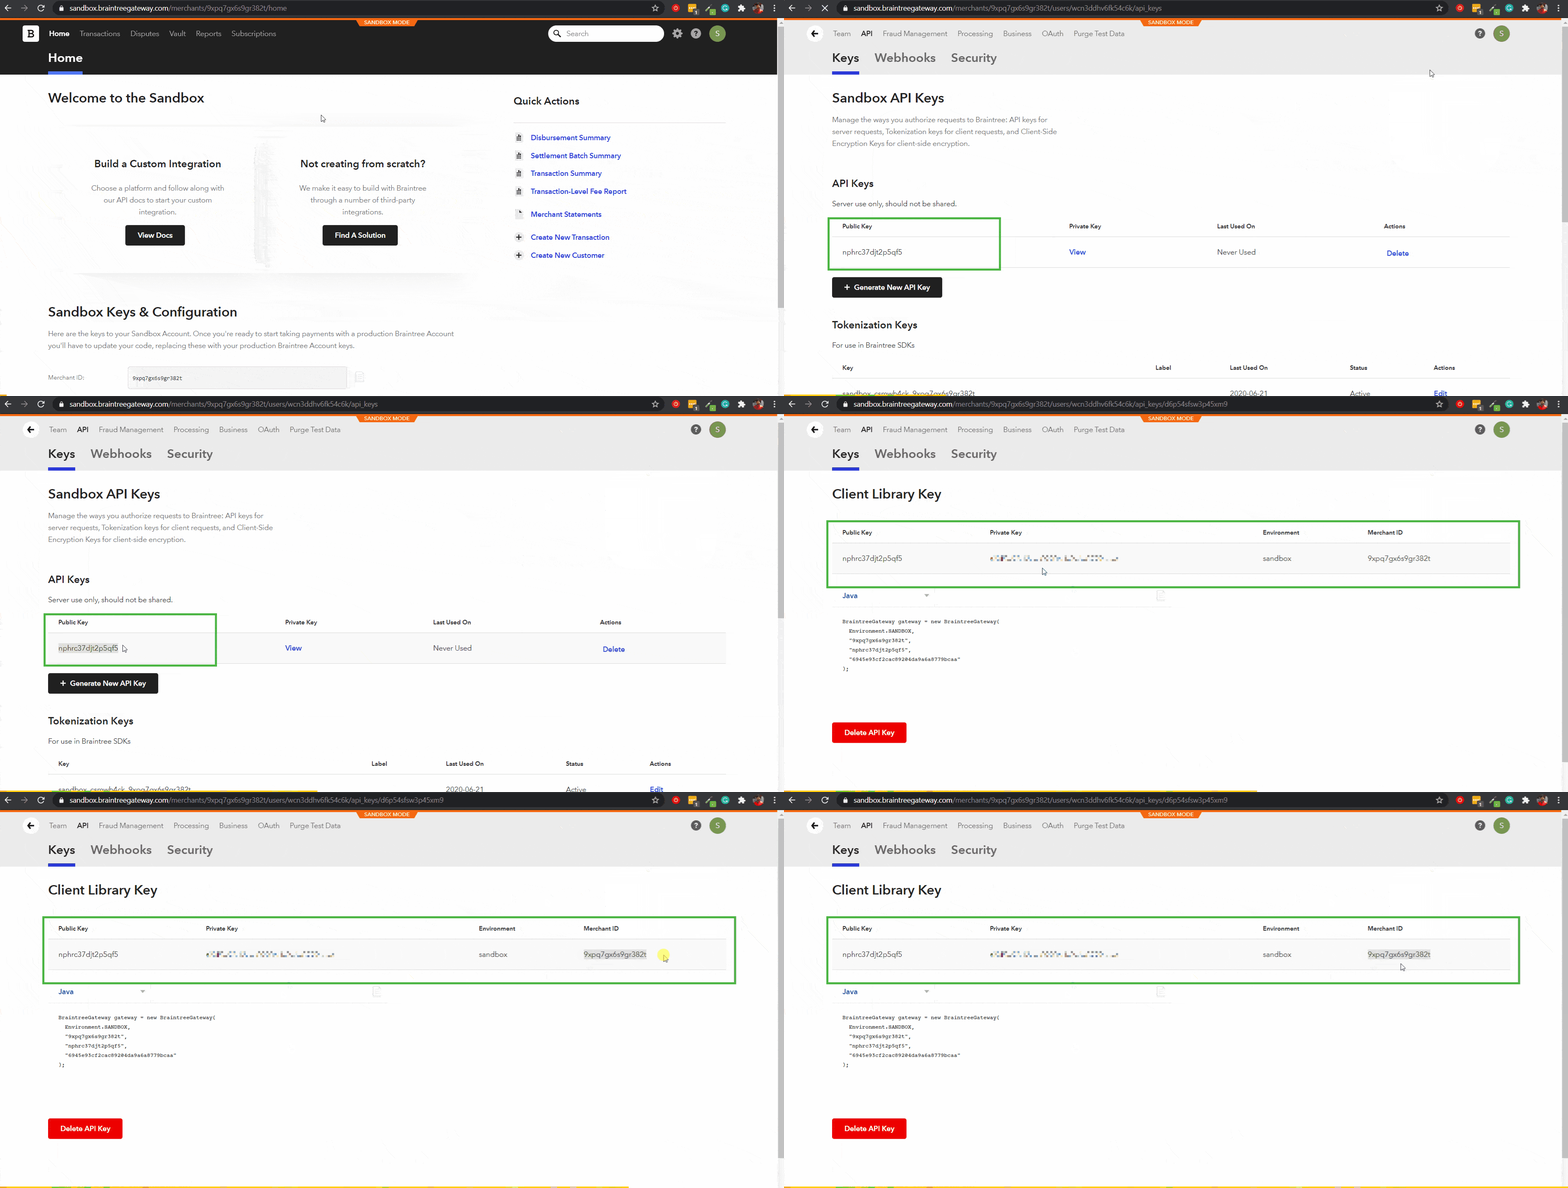
- Login to your Braintree account and note down the Public Key, Private Key, and your Merchant ID.
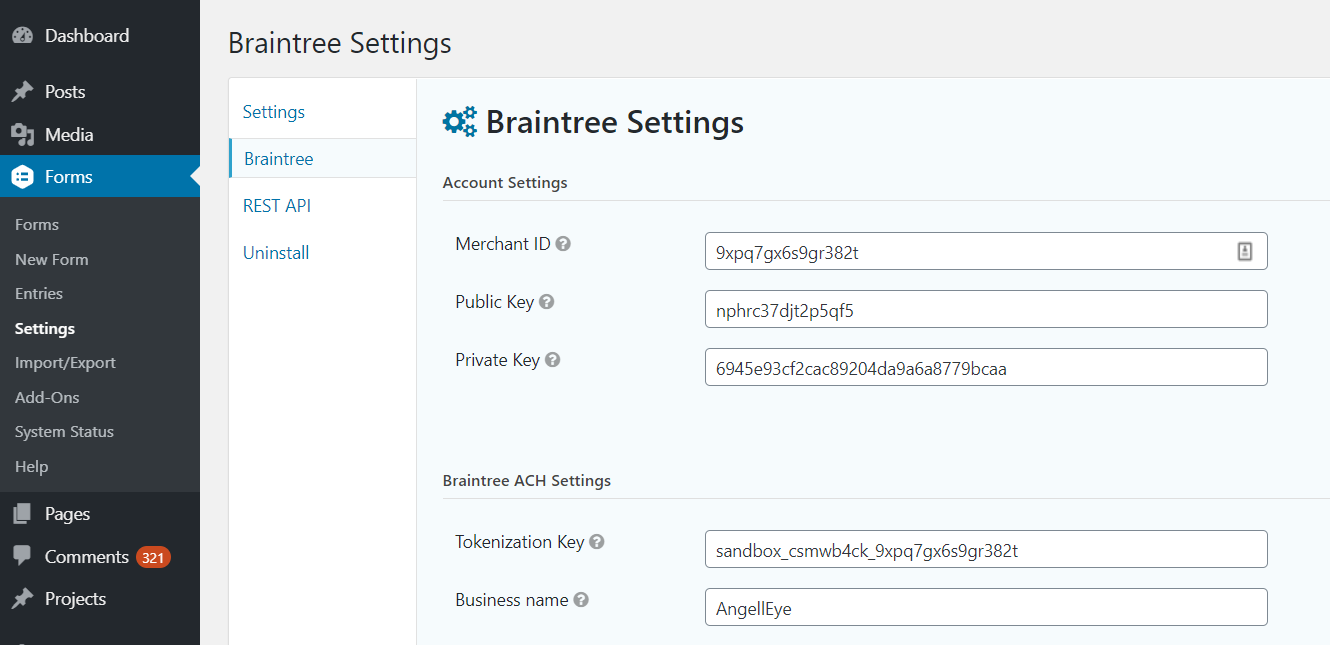
- Set Merchant ID, Public Key and Private Key in WP Dashboard > Forms > Settings > Braintree.
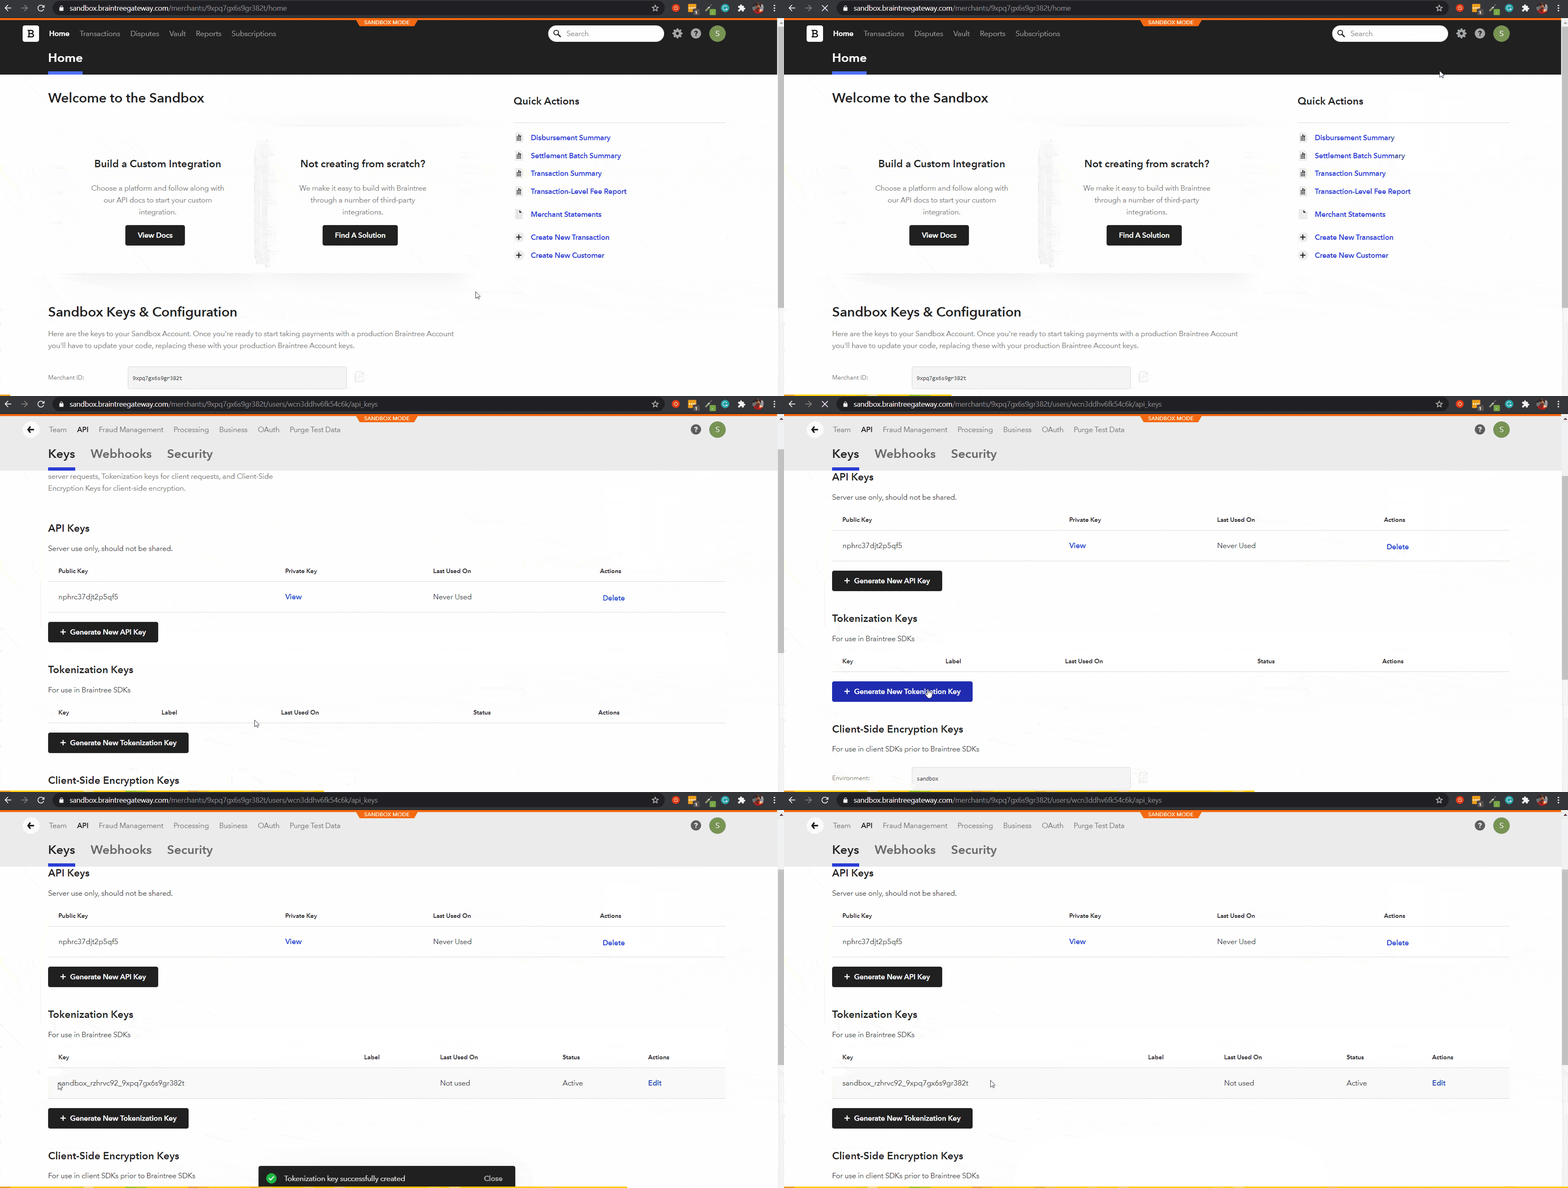
- Login to your Braintree account and generate a new Tokenization key.
Set the Tokenization key and your business name in WP Dashboard > Forms > Settings > Braintree.
2. Set up ACH Payments in Your Gravity Form
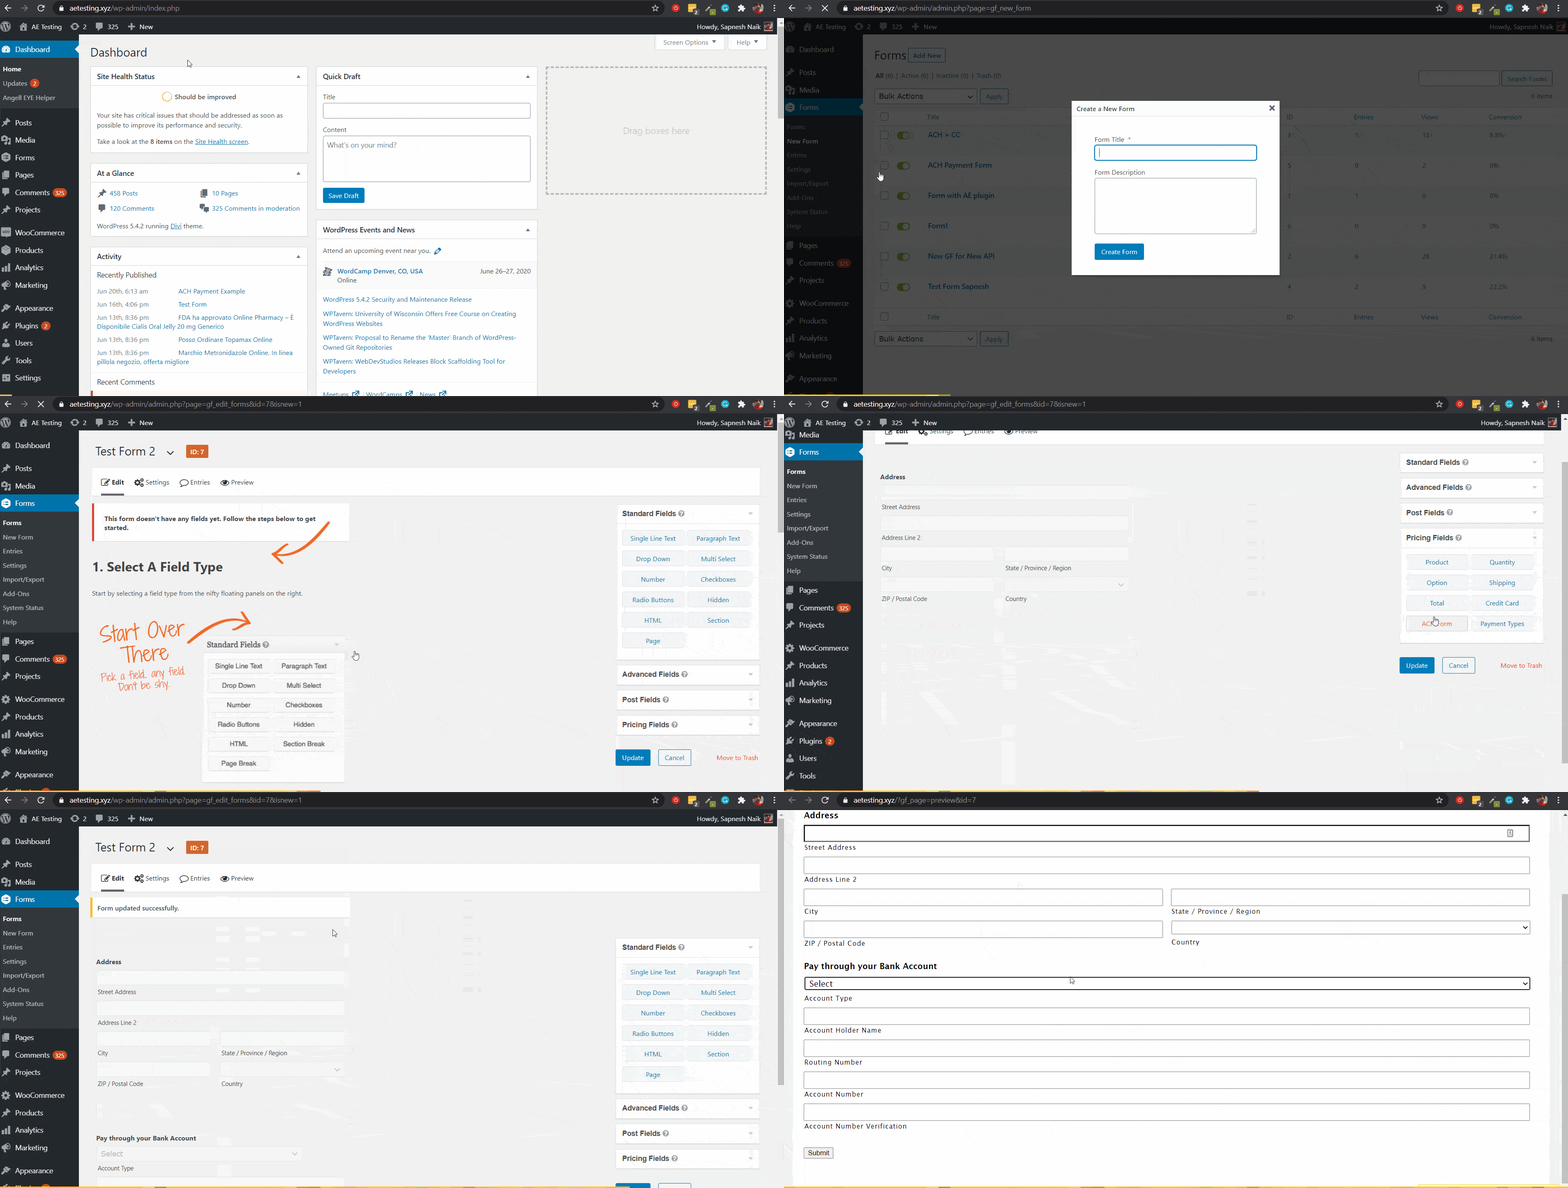
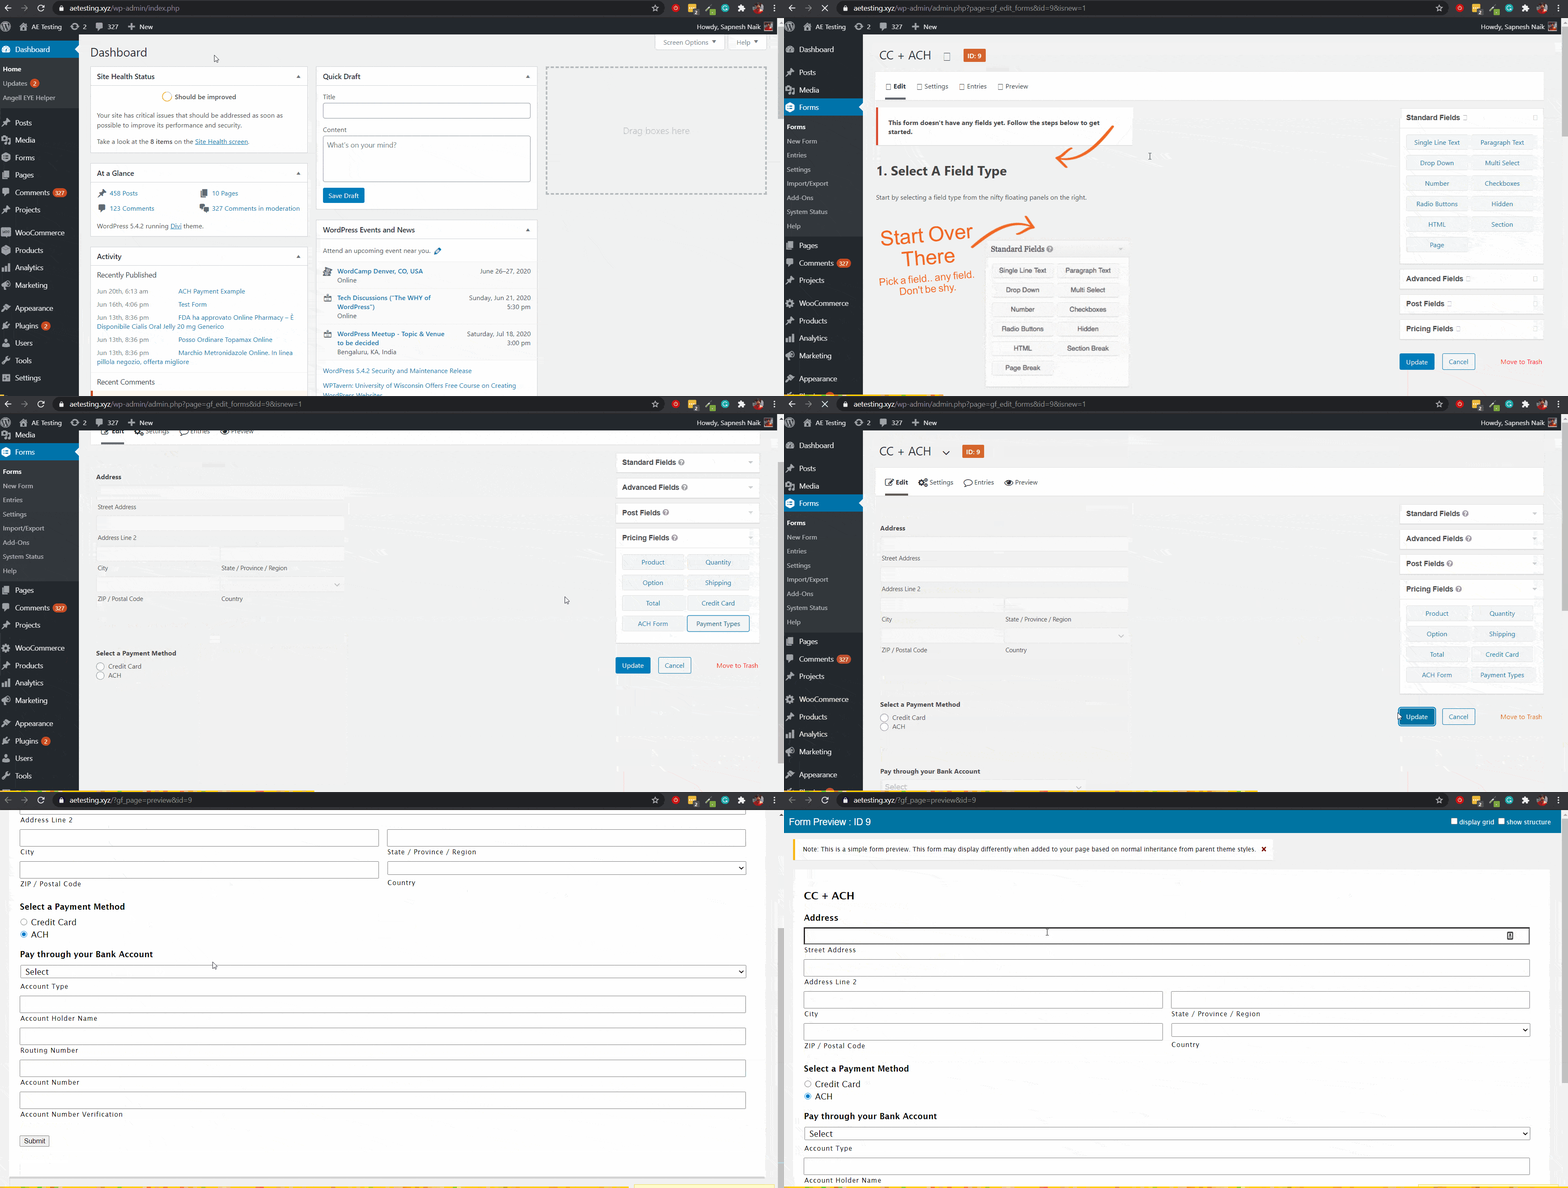
- Your forms need to have these two fundamental fields to accept ACH payments.
- Address field from Advanced Fields tab
- ACH field from the Pricing Fields tab
Use Custom Fields for Shipping and Billing Address
If you have custom inputs for addresses in your form and you want to map them to ACH payment address details, then check out our guide on Gravity Forms Braintree Payments Field Mapping.
3. Use Both ACH and Credit Card Payment Methods Together
- Besides ACH, if you also want to provide an option for Credit card payments in your form, then in addition to the fields shown in Step 2, include the Payment Types and Credit Card fields from the Pricing Fields tab.
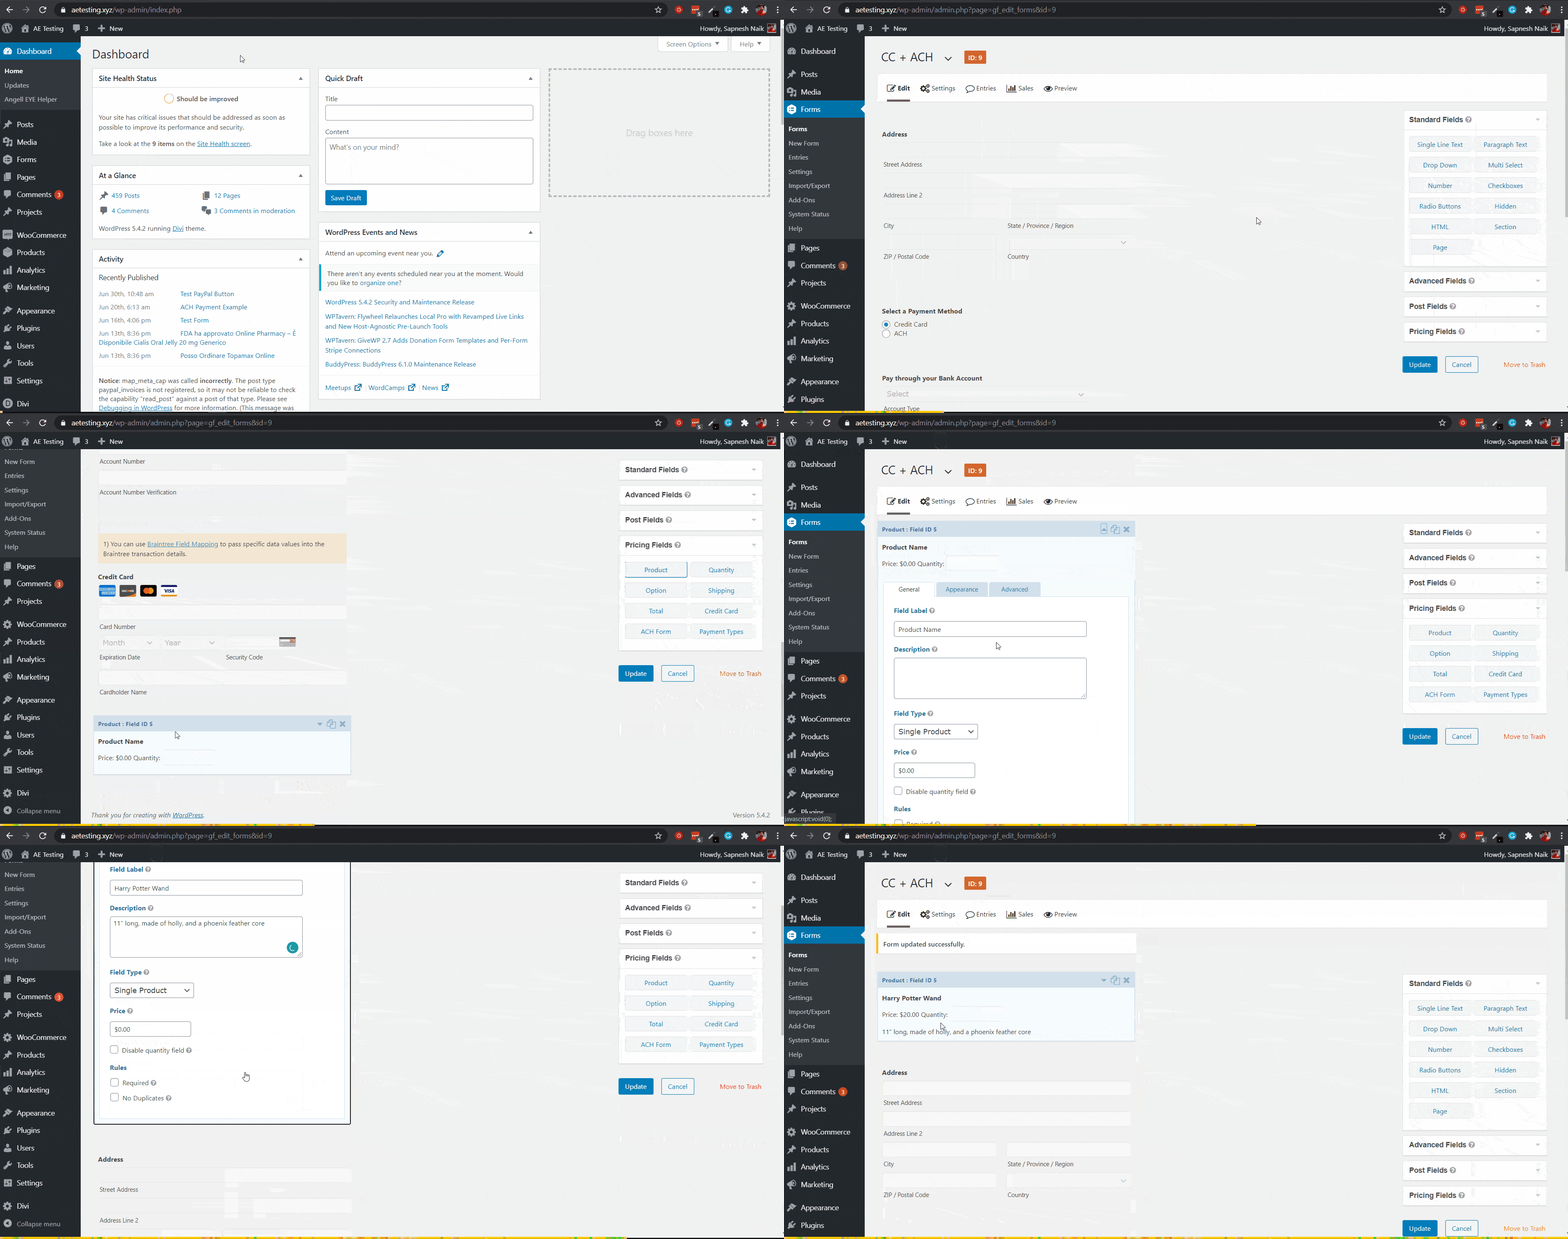
4. Add a Product to Your Form
- To accept payments for a specific product that you want to sell, you will have to add a Product from the Pricing Field tab.
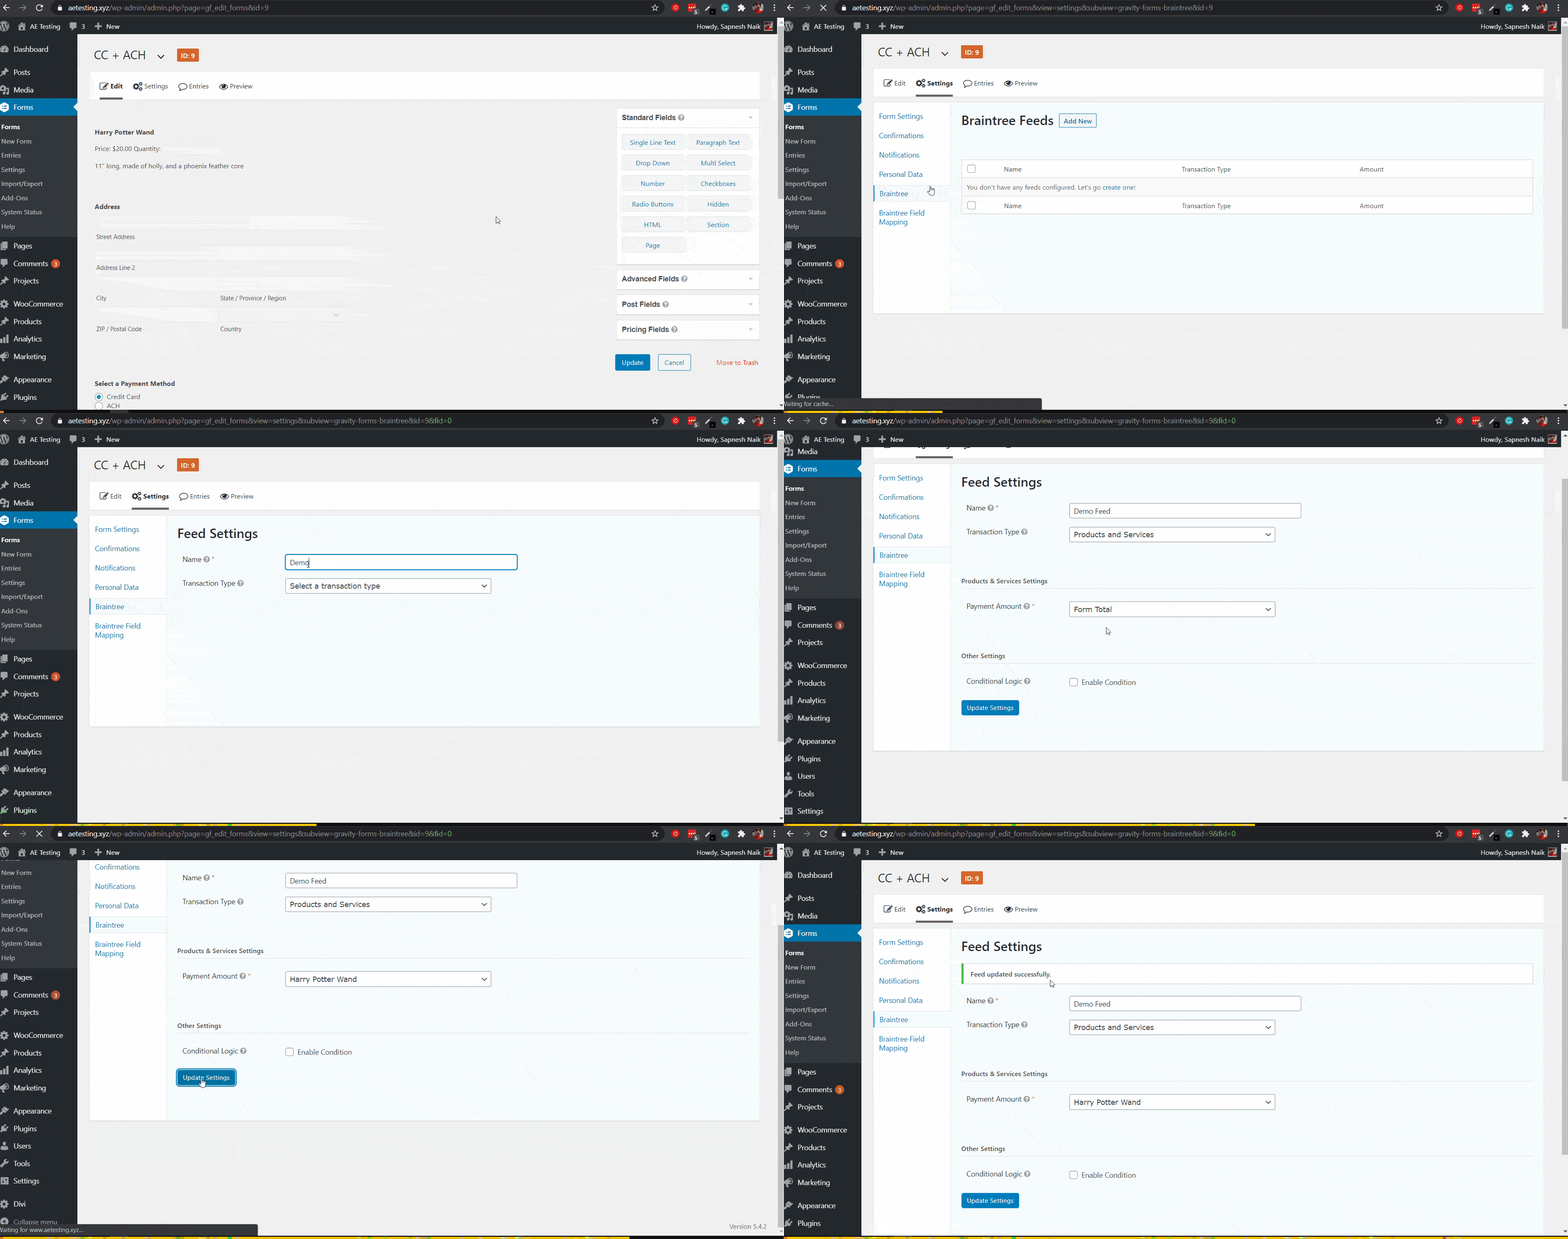
5. Set up A Braintree Feed for Your Form
- Finally, we will complete the setup by including a Braintree feed that will setup transactions with your Braintree account.
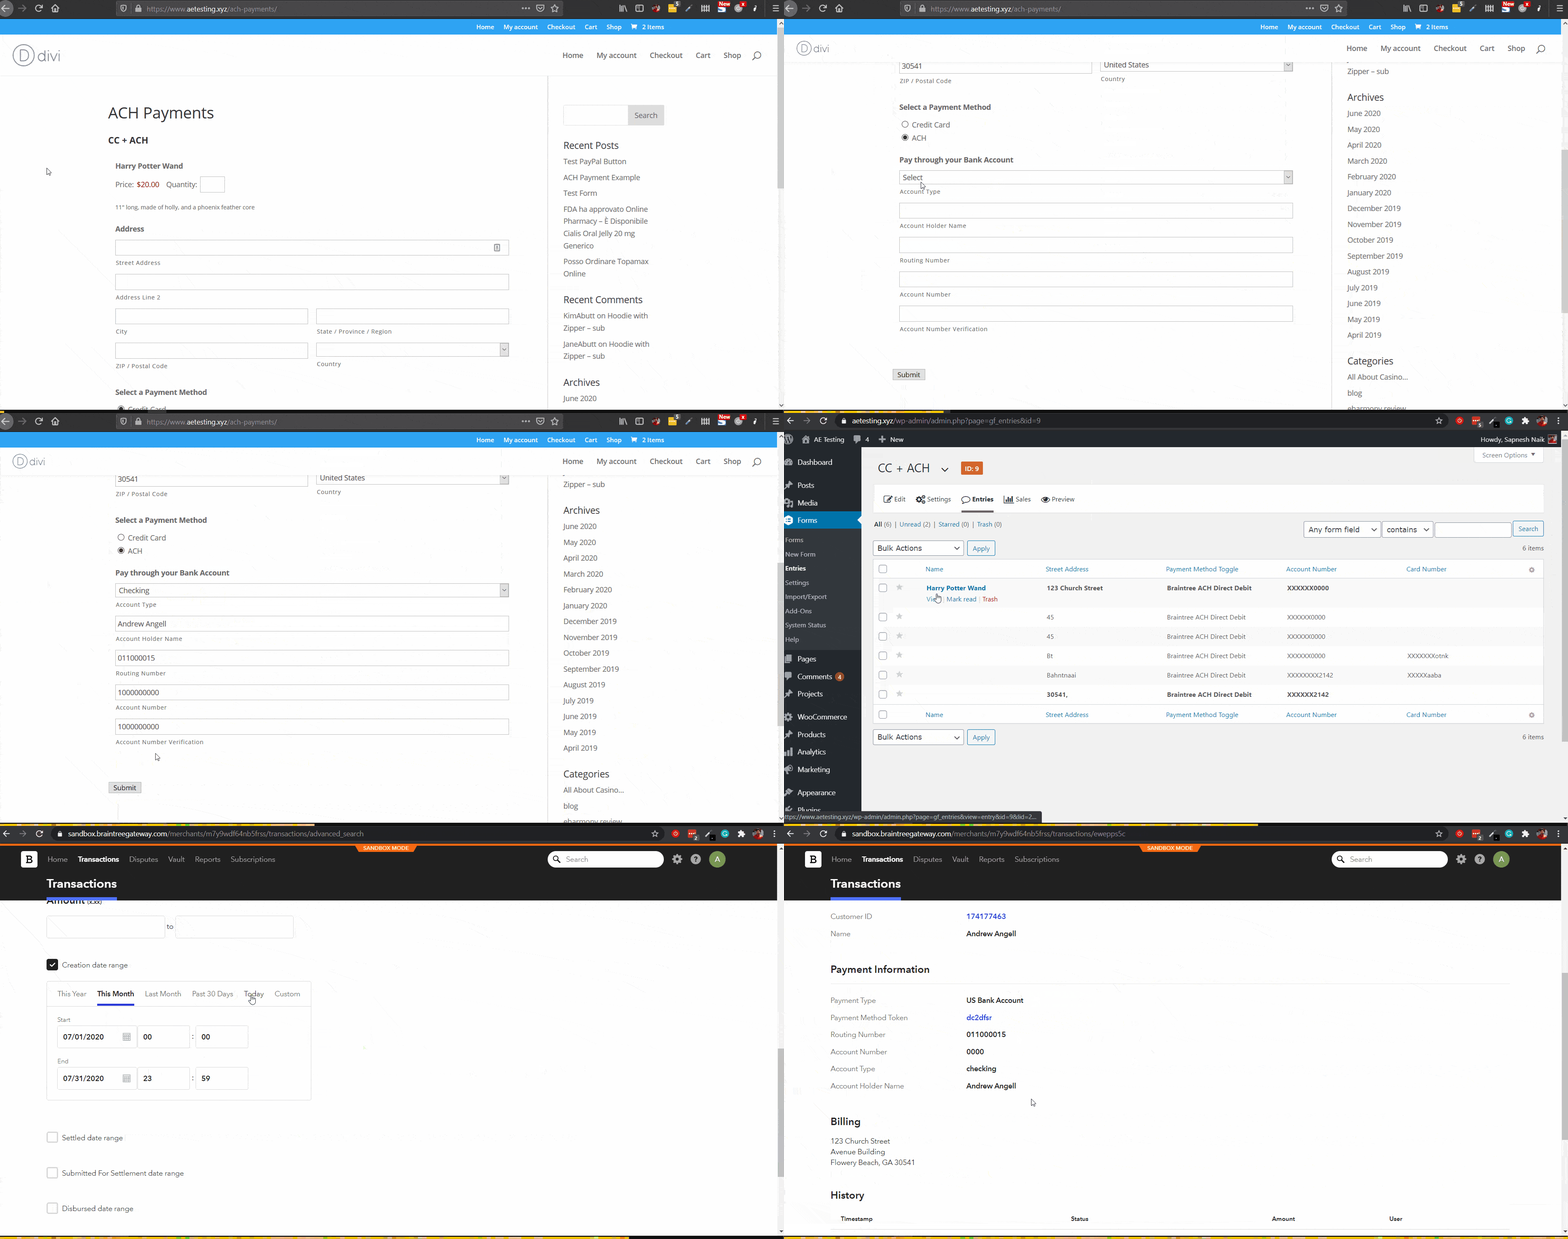
Example 1: Braintree ACH Payments
Example 2: Braintree Credit Card Payments
Conclusion
That’s it! You’re all set to receive Automated Clearing House (ACH) and Credit Card payments in your Gravity Forms. If you need additional help, please submit a ticket at our Support Help Desk.


Your card could not be billed. Please ensure the details you entered are correct and try again.
I’m sorry, I’m confused about what you’re comment is for. This is about ACH, but you seem to be talking about credit cards..?? Are you trying to use the plugin and you’re getting this error? Please submit a ticket to our help desk for more support on that sort of thing.
Do ACH payments require some verification? as far as I understood, Braintree requires to verify ACH payments. How does the plugin handle that?
Hi. As long as you have ACH enabled in your BT account, then you can enable it in the plugin and it will display the appropriate form fields to allow people to pay that way.
Does this plugin use Braintree’s built-in subscription/recurring billing services, or do you host the recurring logic and submit vaulted transaction, using tokens generated from either the Credit/Debit Card or ACH payment methods
This creates everything directly with Braintree.
I’ve got a Braintree Sandbox setup, I have requested that they turn on ACH Payments. I have a form setup with both Credit Card & ACH and while the Credit Card processing works the ACH just sits and spins with the Submit button text showing “Please wait…” but no further action is taking place. I can see requests out to PayPal and some PayPal iframes being added to the site but no ACH transaction processing seems to be happening. I have the Gravity Forms form set to be included on the page via AJAX. I have no problem with processing a Credit Card on the same form with the same data. Is there an ACH setup step that I’m missing, or does the form have to be setup a specific way for it to work? Thanks!
I’m sorry I missed you here. Hopefully you were able to get help through our help desk..?? If not, please create a ticket there and we’ll get you taken care of. Thanks!
Hi bro,
I enable the sandbox mode in the Ach form. But i am facing this type of alert error message
(There was an error initiating the bank request. Please try again.)
Site url
https://sivarameshtn.in/form/
Please submit a ticket for this at https://angelleye.com/support and we’ll look into this more with you. Thanks.