Step 1 – Download the Solution Files
There are two methods you can use to download the PayPal Virtual Terminal PHP files.
- GitHub Clone
- Download ZIP / Extract.
Both of these options are available on our GitHub repo page.
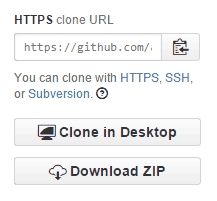
PayPal Virtual Terminal PHP Download
GitHub Clone (Recommended)
- Copy the master branch clone URL to your clipboard.
https://github.com/angelleye/paypal-virtual-terminal-php/tree/master - Browse to the directory in your website / application where you would like the PayPal Virtual Terminal to be installed.
- Run the following command to clone the solution into your current directory.
git clone https://github.com/angelleye/paypal-virtual-terminal-php.git
Download ZIP / Extract
- Download the zipped solution files.
- Extract the solution files to a directory in your website / application where you would like the PayPal Virtual Terminal to be installed.
Step 2 – Prepare a Config File
- Open the /includes/config-sample.php file.
- Save the file as config.php.
- If you save the config file to a location other than /includes you will need to update the include path in the following files.
- /bin/process.php
- /pages/index.php
- If you save the config file to a location other than /includes you will need to update the include path in the following files.
- Adjust the settings in the config file to suit your needs.
Timezone Setting
Sandbox / Test Mode
- TRUE – The PayPal sandbox will be used.
- FALSE – The PayPal live servers will be used.
You will need to create a PayPal sandbox seller account in order to run tests against the PayPal sandbox.
Debug Mode
- TRUE – API request / response details will be output to the screen when transactions are completed.
- FALSE – No API details will be displayed.
API Selection
- PayPalPro-DDP – This will enable the Website Payments Pro 3.0 platform, which utilizes PayPal’s DoDirectPayment API.
- PayPalPro-PayFlow – This will enable the Payments Pro 2.0 platform, which utilizes PayPal’s PayFlow API.
- PayPal-Rest – This will enable the PayPal REST platform, which does not require Payments Pro and utilizes the general PayPal REST API.
API Credentials
- PayPalPro-DDP will require a username, password, and signature.
- PayPal-Pro-PayFlow will require a username, password, vendor, and partner.
- PayPal-REST will require a client ID and a client secret.
There are placeholders available for both SANDBOX and LIVE credentials, so you will need to make sure you place the correct credentials into the correct placeholders accordingly.
Currency Sign
Currency Code
- AUD – Australian Dollar
- CAD – Canadian Dollar
- CZK – Czech Koruna
- DKK – Danish Krone
- EUR – Euro
- HKD – Hong Kong Dollar
- HUF – Hungarian Forint
- JPY – Japanese Yen
- NOK – Norwegian Krone
- NZD – New Zealand Dollar
- PLN – Polish Zloty
- GBP – Pound Sterling
- SDG – Singapore Dollar
- SEK – Swedish Krona
- CHF – Swiss Franc
- USD – US Dollar
Show Left Nav Menu
- TRUE – Displays the left sidebar menu.
- FALSE – Hides the left sidebar menu.
Show Swipe Field
- TRUE – Displays the SWIPE field on the form.
- FALSE – Hides the SWIPE field.
Default Form Setting - Billing Address
- TRUE – Billing address will be displayed by default.
- FALSE – Billing address will not be displayed by default.
Default Form Setting - Shipping Not Required
- TRUE – Shipping Not Req. will be enabled by default.
- FALSE – Shipping Not Req. will not be enabled by default.
Default Form Setting - Shipping Same as Billing
- TRUE – Same As Billing will be enabled by default.
- FALSE – Same As Billing will be disabled by default.
Set Default Tax Rate
This will only be used as a default. The tax rate may still be changed on the PayPal Virtual Terminal form at the time of any transaction.
Enable Transaction Log
- $config[‘LogEnabled’] – TRUE enables logging. FALSE disables logging.
- $config[‘LogFilePath’] – Sets the path where you would like the log file to be saved. This path must be writable by the application.
Step 4 – Load the PayPal Virtual Terminal PHP Solution
To use the tool, open a web browser and enter the URL to the location you installed it on your server.
For example, if you uploaded the solution to a /paypal-virtual-terminal directory on your server, you would browse to http://www.yourdomain.com/paypal-virtual-terminal/.
This will display the PayPal Virtual Terminal form on your screen and you may proceed to process credit cards!
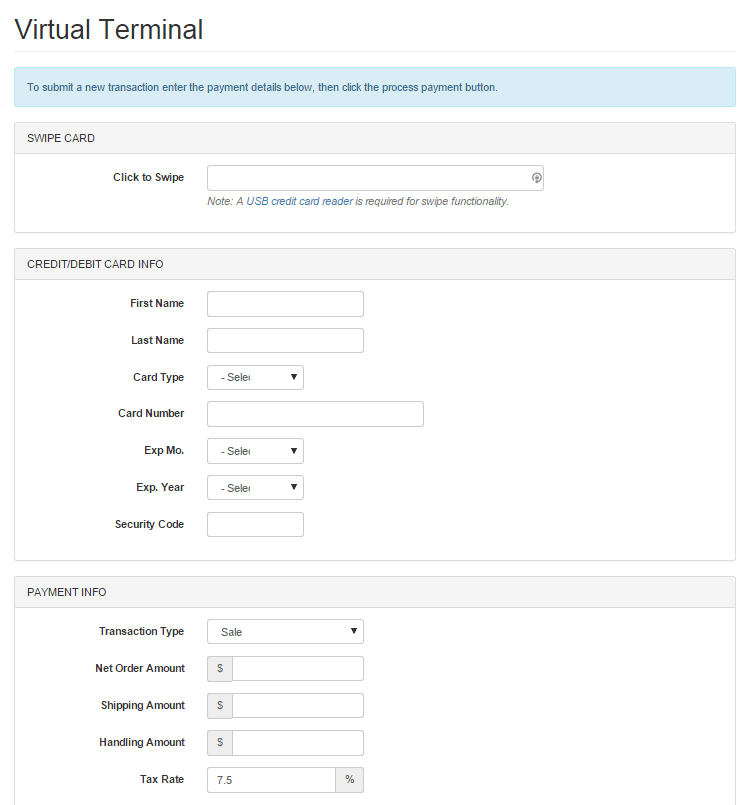
PayPal POS Credit Card Payment Virtual Terminal Form
HI I have a install of PayPal Virtual Terminal from some time ago. It looks like I installed it 3/2016 It still works but when I process it just sits on processing with the wheel spinning, however if I log into PayPal it recognizes the sale. I am curious if this has been updated? I cannot find a version number. I also want to make sure this is still safe to use and PCI compliant?
Sounds like you must have some sort of a JS conflict happening. Are you familiar with using Chrome Console or Firebug to track JS errors on the page? We would need to see that to get an idea of what could be wrong.
It would be best if you can please submit a ticket to our help desk with as much detail as possible. We can get you taken care of and get all your questions answered.
Hey Scott, I am having the same issue, were you able to figure it out?