Introduction
In part 1 of this 2-part series, we discussed the overall structure of Magento, where files and directories are supposed to go, and how XML configuration files and templates work.
Now, I’d like to dive a little deeper and look at how modules work within Magento. We’ll cover the basics and then build a classic “Hello World” module using everything covered in both parts.
How do Magento Modules Work?
The Magento platform is a modular system, meaning that we basically have a bunch of small pieces of functionality (modules) stacked on top of each other to build the overall solution. The entire Magento core is built in this manner, and building custom modules works the same way.
This is one of the primary things that make Magento so extensible. You can build custom modules following the same standards that the core modules use and you’ll never have to worry about an update destroying your hard work.
All of the modules built in to the platform are located in the /app/code directory. Within this directory you’ll find three sub-directories that provide separation for the different types of modules that can be built in to Magento.
First, you’ll find the /community directory, which is where all public modules are installed in to your system. These modules typically include anything downloaded from Magento Connect, or really any code that you’re running that is not part of the core Magento platform or one of your own.
Second, the /core directory, as you can probably guess, is where all of the original core modules for Magento reside in the system. If you take a gander at this directory you’ll see all of the Magento functionality from administration, to inventory, payments, shipping, Google Analytics, newsletters, etc. is housed in this folder. You can study the structure of these modules any time you’d like to learn a little bit more about how things are working or how to build your own more complex modules.
Finally, we have the /local directory. This is where all of your locally developed modules will reside. It’s nice to keep anything you haven’t downloaded (or that isn’t public in general) here simply to keep it nicely organized and keep all of your own work separate. This is where we’ll be spending our time building our Hello World module.
Module Structure
If you took some time to study the core modules you’ll notice that they all follow the same standard for how they’re structured. Not every directory will be used with every module you create, but I like generally like to start fresh with an empty set of directories for everything I might need. Let’s break this down a little bit now.
First, you need to consider a namespace/package name that you can assign to your modules. This will end up being a directory under /app/code/local/ so you’ll want to try and make it something unique so your modules won’t conflict with another package that could potentially be named the same thing.
All of the modules you develop related to each other will reside in sub-directories beneath your package directory (ie. /app/code/local/{Packagename}/{Modulename}/.
Within your package directory you’ll create a separate folder for any new module you develop. Each module will have the same structure as depicted here.
| /Block | Controller functions called by XML configuration files will be placed here. |
| /controllers | Standard controller functions for the module that process the majority of the data for the module will reside here. |
| /etc | This is where you’ll store any configuration files for your module. |
| /Helper | Helpers in Magento are functions that perform common tasks on objects and variables in the system. |
| /Model | Generally, any RAW data is accessed and distributed through models and passed into controllers. You’ll keep functions for accessing your data sources directly here. |
| /sql | Here you’ll store code to handle SQL updates on the system when your module is installed/upgraded/uninstalled. |
The template files for a module’s display options will reside in the following locations.
| /app/design/frontend/<interface>/<theme_name>/layout/example | This is where XML config files will be stored. |
| /app/design/frontend/<interface>/<theme_name>/template/example | This is where the actual template files for output will be stored. |
Administration templates files will follow the same structure, but will reside in a different location.
- /app/design/adminhtml/<interface>/<theme_name>/layout/example
- /app/design/adminhtml/<interface>/<theme_name>/template/example
Hello World Custom Module
Finally, let’s put all of this into action and actually build a custom module. We’ll use the age-old Hello World application to put together a module using everything we’ve discussed up to this point in both parts of this series.
Our module will be extremely simple and will do nothing more than output the words Hello World to the screen. We will follow module standards, though, in order to get a feel for constructing a module and configuration files.
Let’s start by creating our module directory structure. I’m using /Angelleye as my package name, so here’s what I’ll end up with the following.
- /app/code/local/Angelleye/HelloWorld/Block
- /app/code/local/Angelleye/HelloWorld/controllers
- /app/code/local/Angelleye/HelloWorld/etc
- /app/code/local/Angelleye/HelloWorld/Helper
- /app/code/local/Angelleye/HelloWorld/Model
- /app/code/local/Angelleye/HelloWorld/sql
Next, we’ll create two configuration files to notify the system that our module exists and provide some information about it.
First, /app/code/local/Angelleye/HelloWorld/etc/config.xml and will contain the following XML data.
<?xml version="1.0" encoding="utf-8"?>
<config>
	<modules>
		<Angelleye_HelloWorld>
		<version>0.1.0</version>
		</Angelleye_HelloWorld>
	</modules>
	<frontend>
		<routers>
		<helloworld>
		<use>standard</use>
		<args>
			<module>Angelleye_HelloWorld</module>
			<frontName>helloworld</frontName>
		</args>
		</helloworld>
		</routers>
	</frontend>
</config>
This configuration file notifies Magento that the module exists and provides version information. It also includes a router so that Magento will load a specified controller based on the URL requested by the client. Let’s look at this more in depth.
When a URL is requested by a client, there are different portions of it that represent different areas of the Magento platform. This is typical of MVC frameworks. The URL is basically compared to the elements included in the XML configuration file which is then used to route the request to specific controllers within your module.
Let’s assume we have Magento installed at http://local.angelleye.com. By specifying the <frontName> tag in our configuration file with a value of “helloworld” we are notifying the system that we would like it to respond to URL’s starting with http://local.angelleye.com/helloworld/{actionControllerName}/{actionMethod}/ accordingly.
The XML file should also contain an element with the value of your module name in all lower-case. That is where the <helloworld> XML node comes from in our scenario.
You will also notice the <module> element that resides next to <frontName> that we discussed earlier. This is the value of your package name and module name separated with an underscore. As such, we end up with Angelleye_HelloWorld here.
For our next confiruation file, we’ll create /app/etc/modules/Angelleye_HelloWorld.xml and it will contain the following XML data.
<?xml version="1.0" encoding="utf-8"?>
<config>
	<modules>
		<Angelleye_HelloWorld>
		<active>true</active>
		<codePool>local</codePool>
		</Angelleye_HelloWorld>
	</modules>
</config>
This file sets the activation status of the plugin as well as its code pool (ie. community, core, local).
At this point you can clear your Magento cache and then you’ll be able to view your module in the Magento admin panel under System -> Configuration -> Advanced. Here, every module available to the system is listed and you can simply Enable/Disable any module at any time. This can be useful for troubleshooting purposes when necessary, and it’s also a quick and easy way to see that Magento recognizes your new module.
Now we’re ready to build our action controller and methods to process the request and return the result. We’ll create a new file in our /Angelleye/HelloWorld/controllers/ directory that we created earlier called IndexController.php and we’ll populate it with the following PHP code.
class Angelleye_HelloWorld_IndexController extends Mage_Core_Controller_Front_Action
{
	public function indexAction(){
		echo ‘<h2>Hello World!</h2>’;
	}
}
Here, we’ve simply created a new controller for our module that extends Magento’s core action controller. We then create the indexAction() method which will run by default any time a URL is requested with /helloworld.
At this point, with everything uploaded to our web server and a fresh clearing of the Magento cache, we can load http://www.domain.com/helloworld and we’ll see our message displayed on screen.
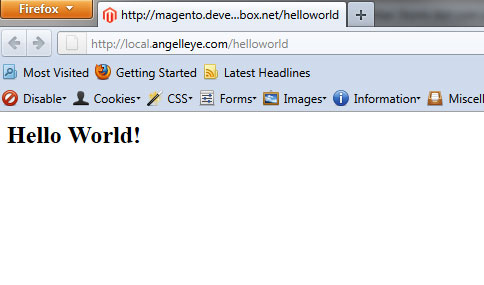
Our controller hasn’t done anything with design so all we get is a blank white page with our Hello World message, but our first Magento module is officially working!
From here you can add design functions to load templates and themes around your output, or create additional action controllers and methods to do more complex things within your system. Everything will follow this same pattern, though, and once you have it down you’ll be able to complete tasks in Magento much more quickly.
Conclusion
We’ve come a long way to complete a very simple Hello World module. I hope all of the information provided has helped you learn more about the structure of Magento and possibly help get past some of the original intimidation that can ensue when you first dive in to Magento customization.
Following the standards described here and getting in good habits will help you avoid problems with future updates and keep you from pulling out all your hair in the future.
Good luck and happy coding!